Well, this was unexpected…
Felipe Antonioso “converts” a CoCo 2 to a CoCo 3
Leave a reply

Well, this was unexpected…
I had really hoped that Apple would stay away from all the useless bells and whistles that get in the way of doing actual work. Services like Instagram introduced us to the concept of “filters” on our photos. Today, every phone — sadly, even iPhones — has a bunch of filters you can choose from to make your photo less realistic. Which apparently is an important thing.
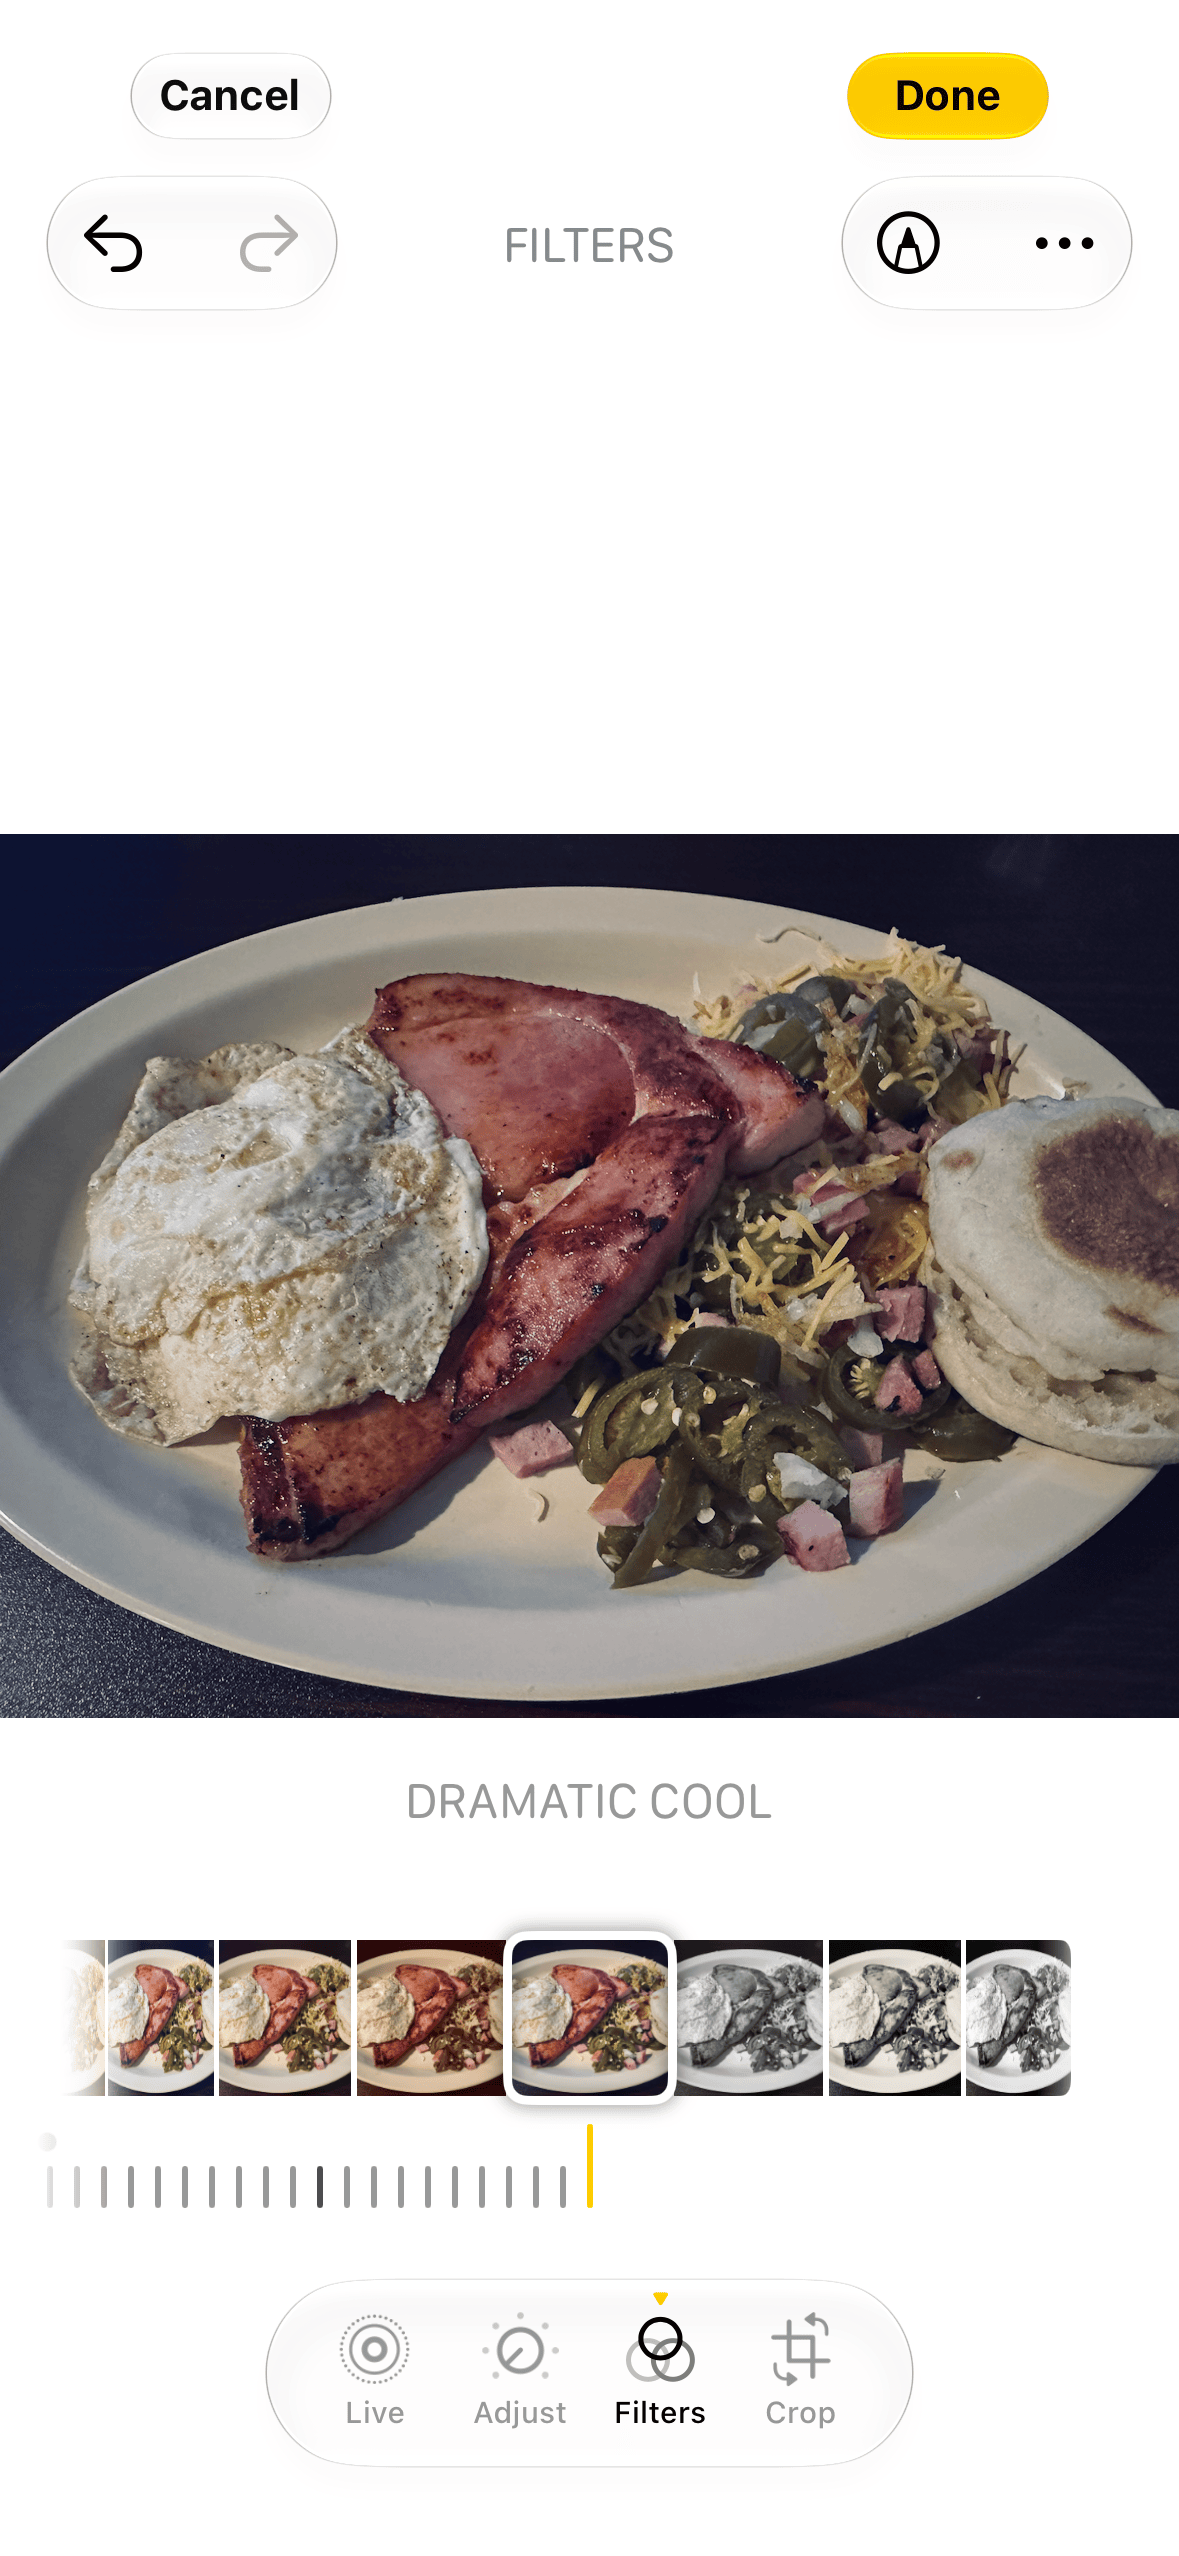
Here is my “dramatic cool” breakfast.
Years before we were labeling everything as “A.I.”, certain Android phones had built-in features like object removal, and similar apps were available as a download for iPhones. You could use this to remove something from your photo that you did not want to be there. While I do understand the usefulness of this, it was just one of many things that will be making the future view of history less accurate. “We have 50,000 photos of this person, but we still don’t know what they actually looked like…”
I had really hoped Apple would avoid all that, but, sadly, with the latest iOS 27 release, even more A.I. stuff has made it into the iPhone.
Here is my breakfast photo.
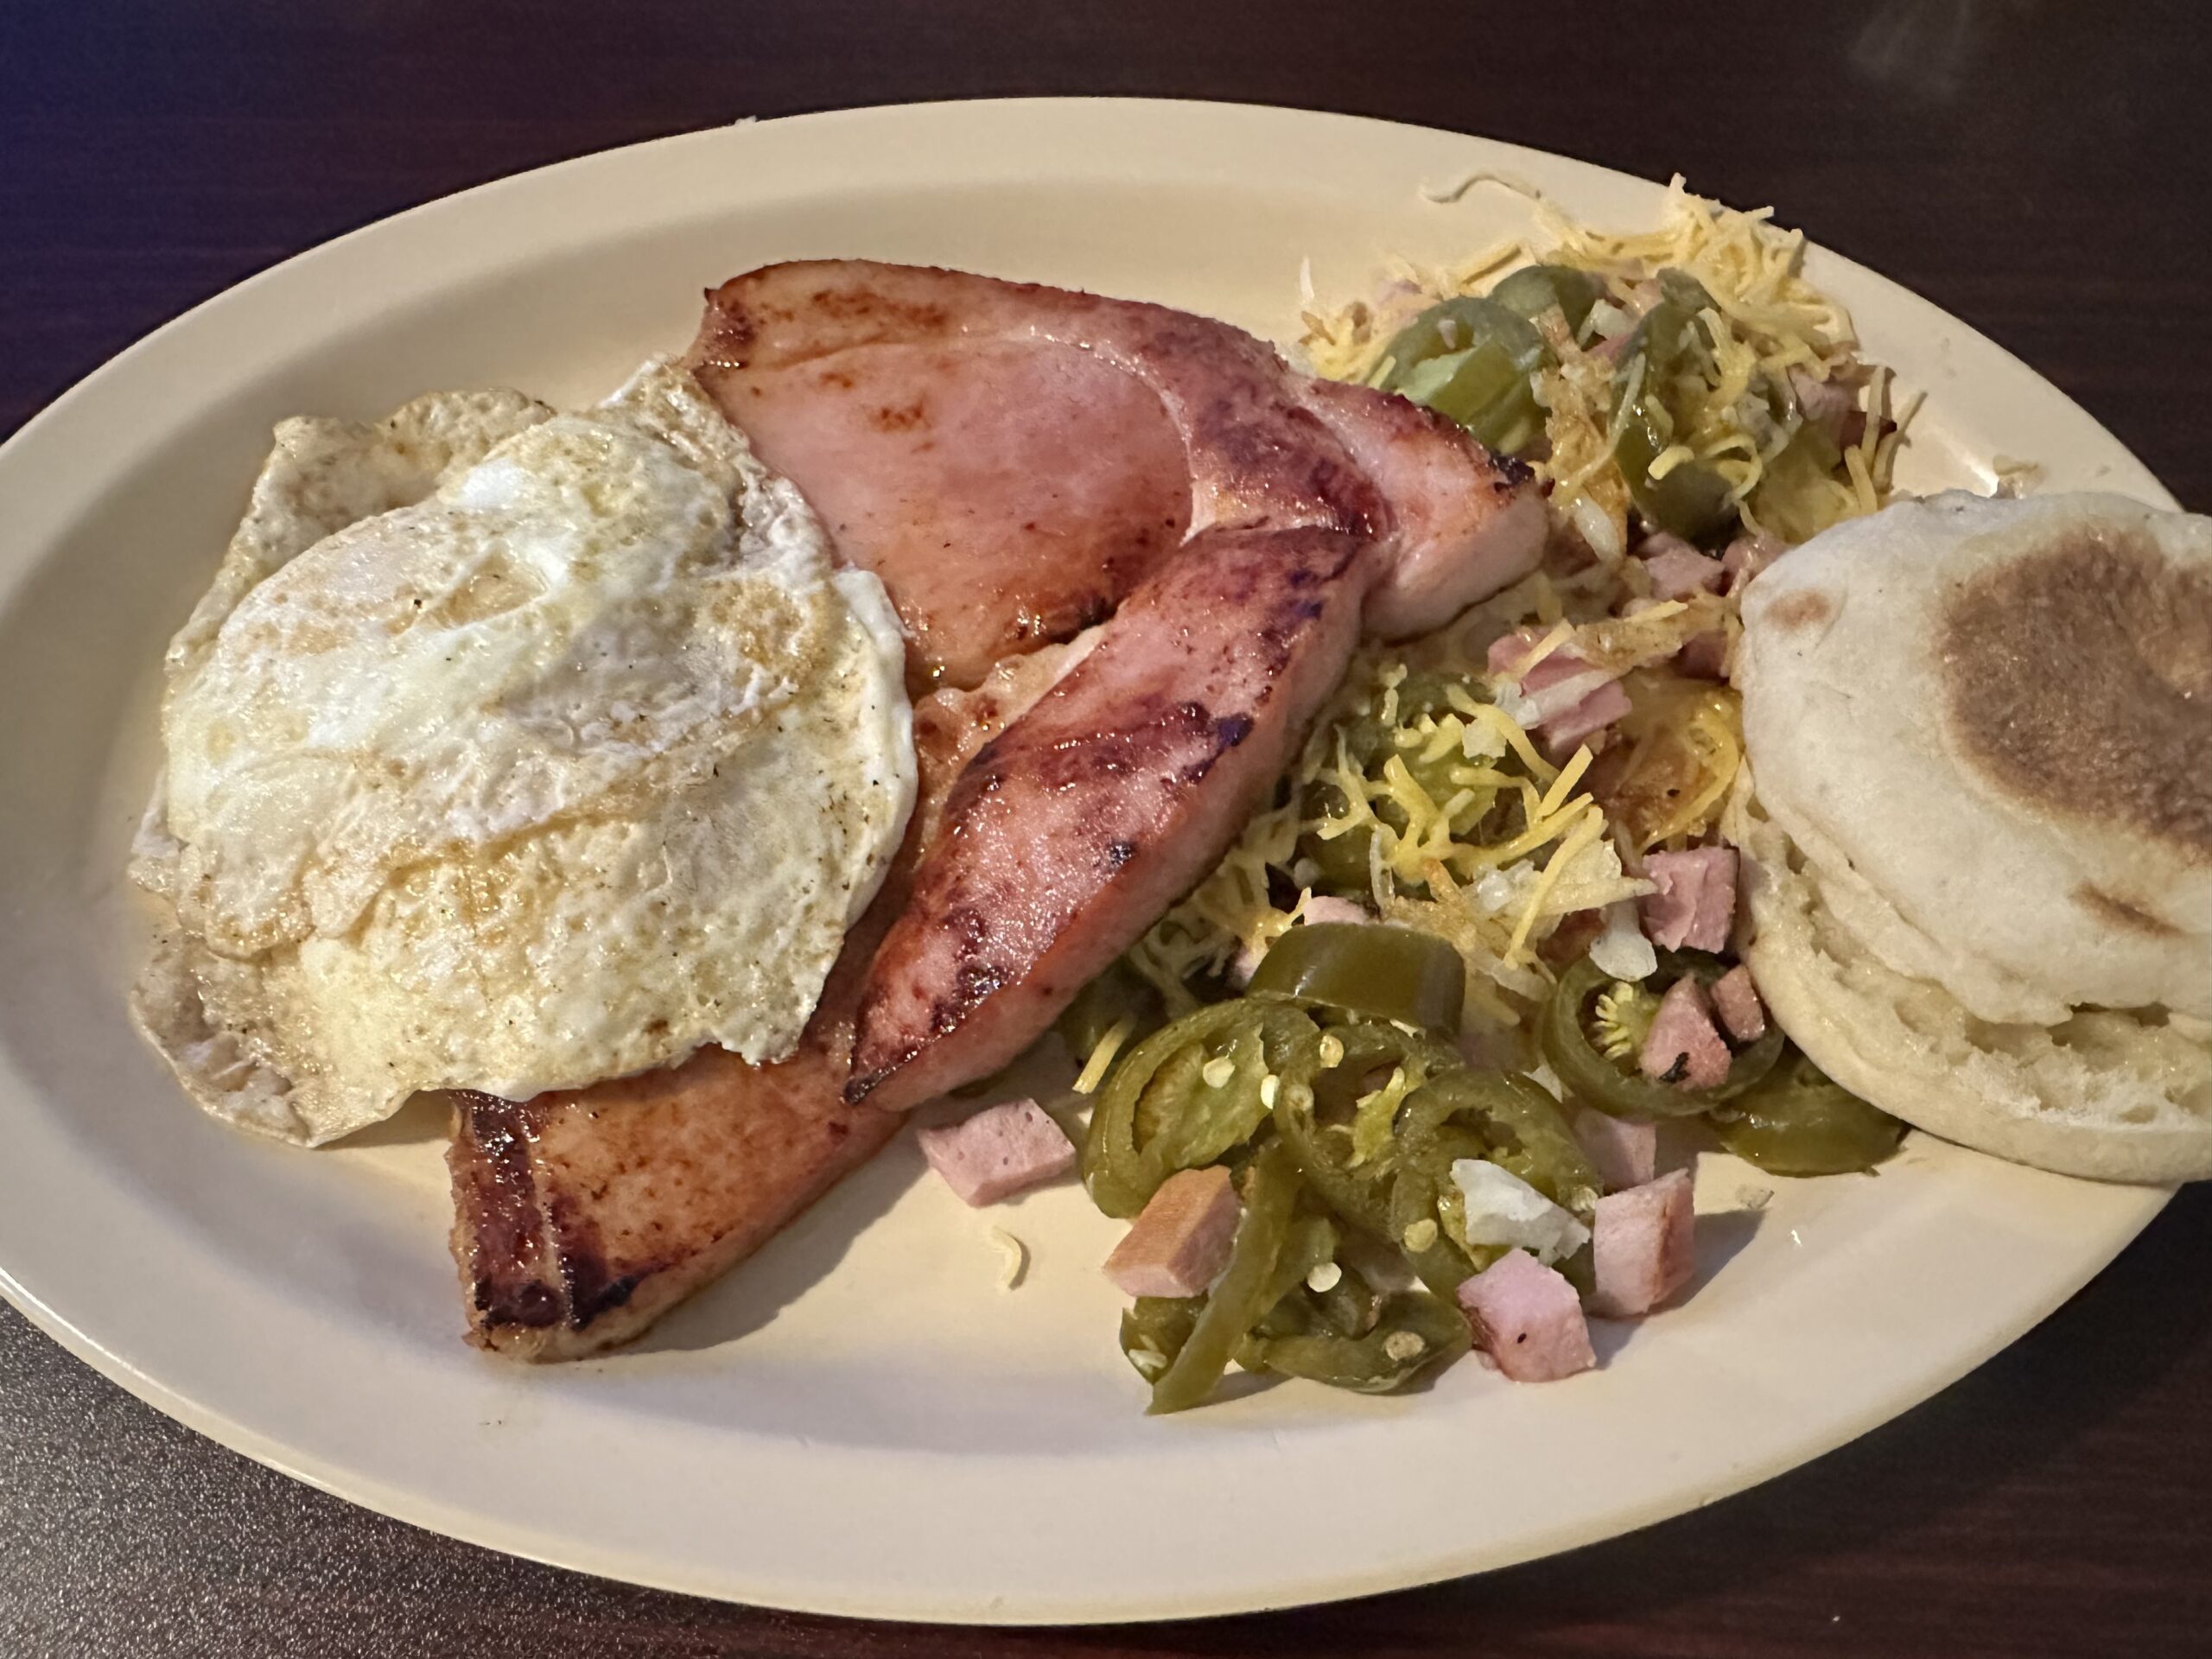
In spite of me taking digital photos since 1996, I still do not claim to be a photographer. I really don’t know anything beyond “point and shoot.” So, sure, I cut off the edge of the plate and English muffin. I was focusing on the main breakfast. No one really needs to see the edge of the muffin or plate, do they?
Yet, with Apple Intelligence, now you can “extend” a photo and get fake versions of what might have been there.
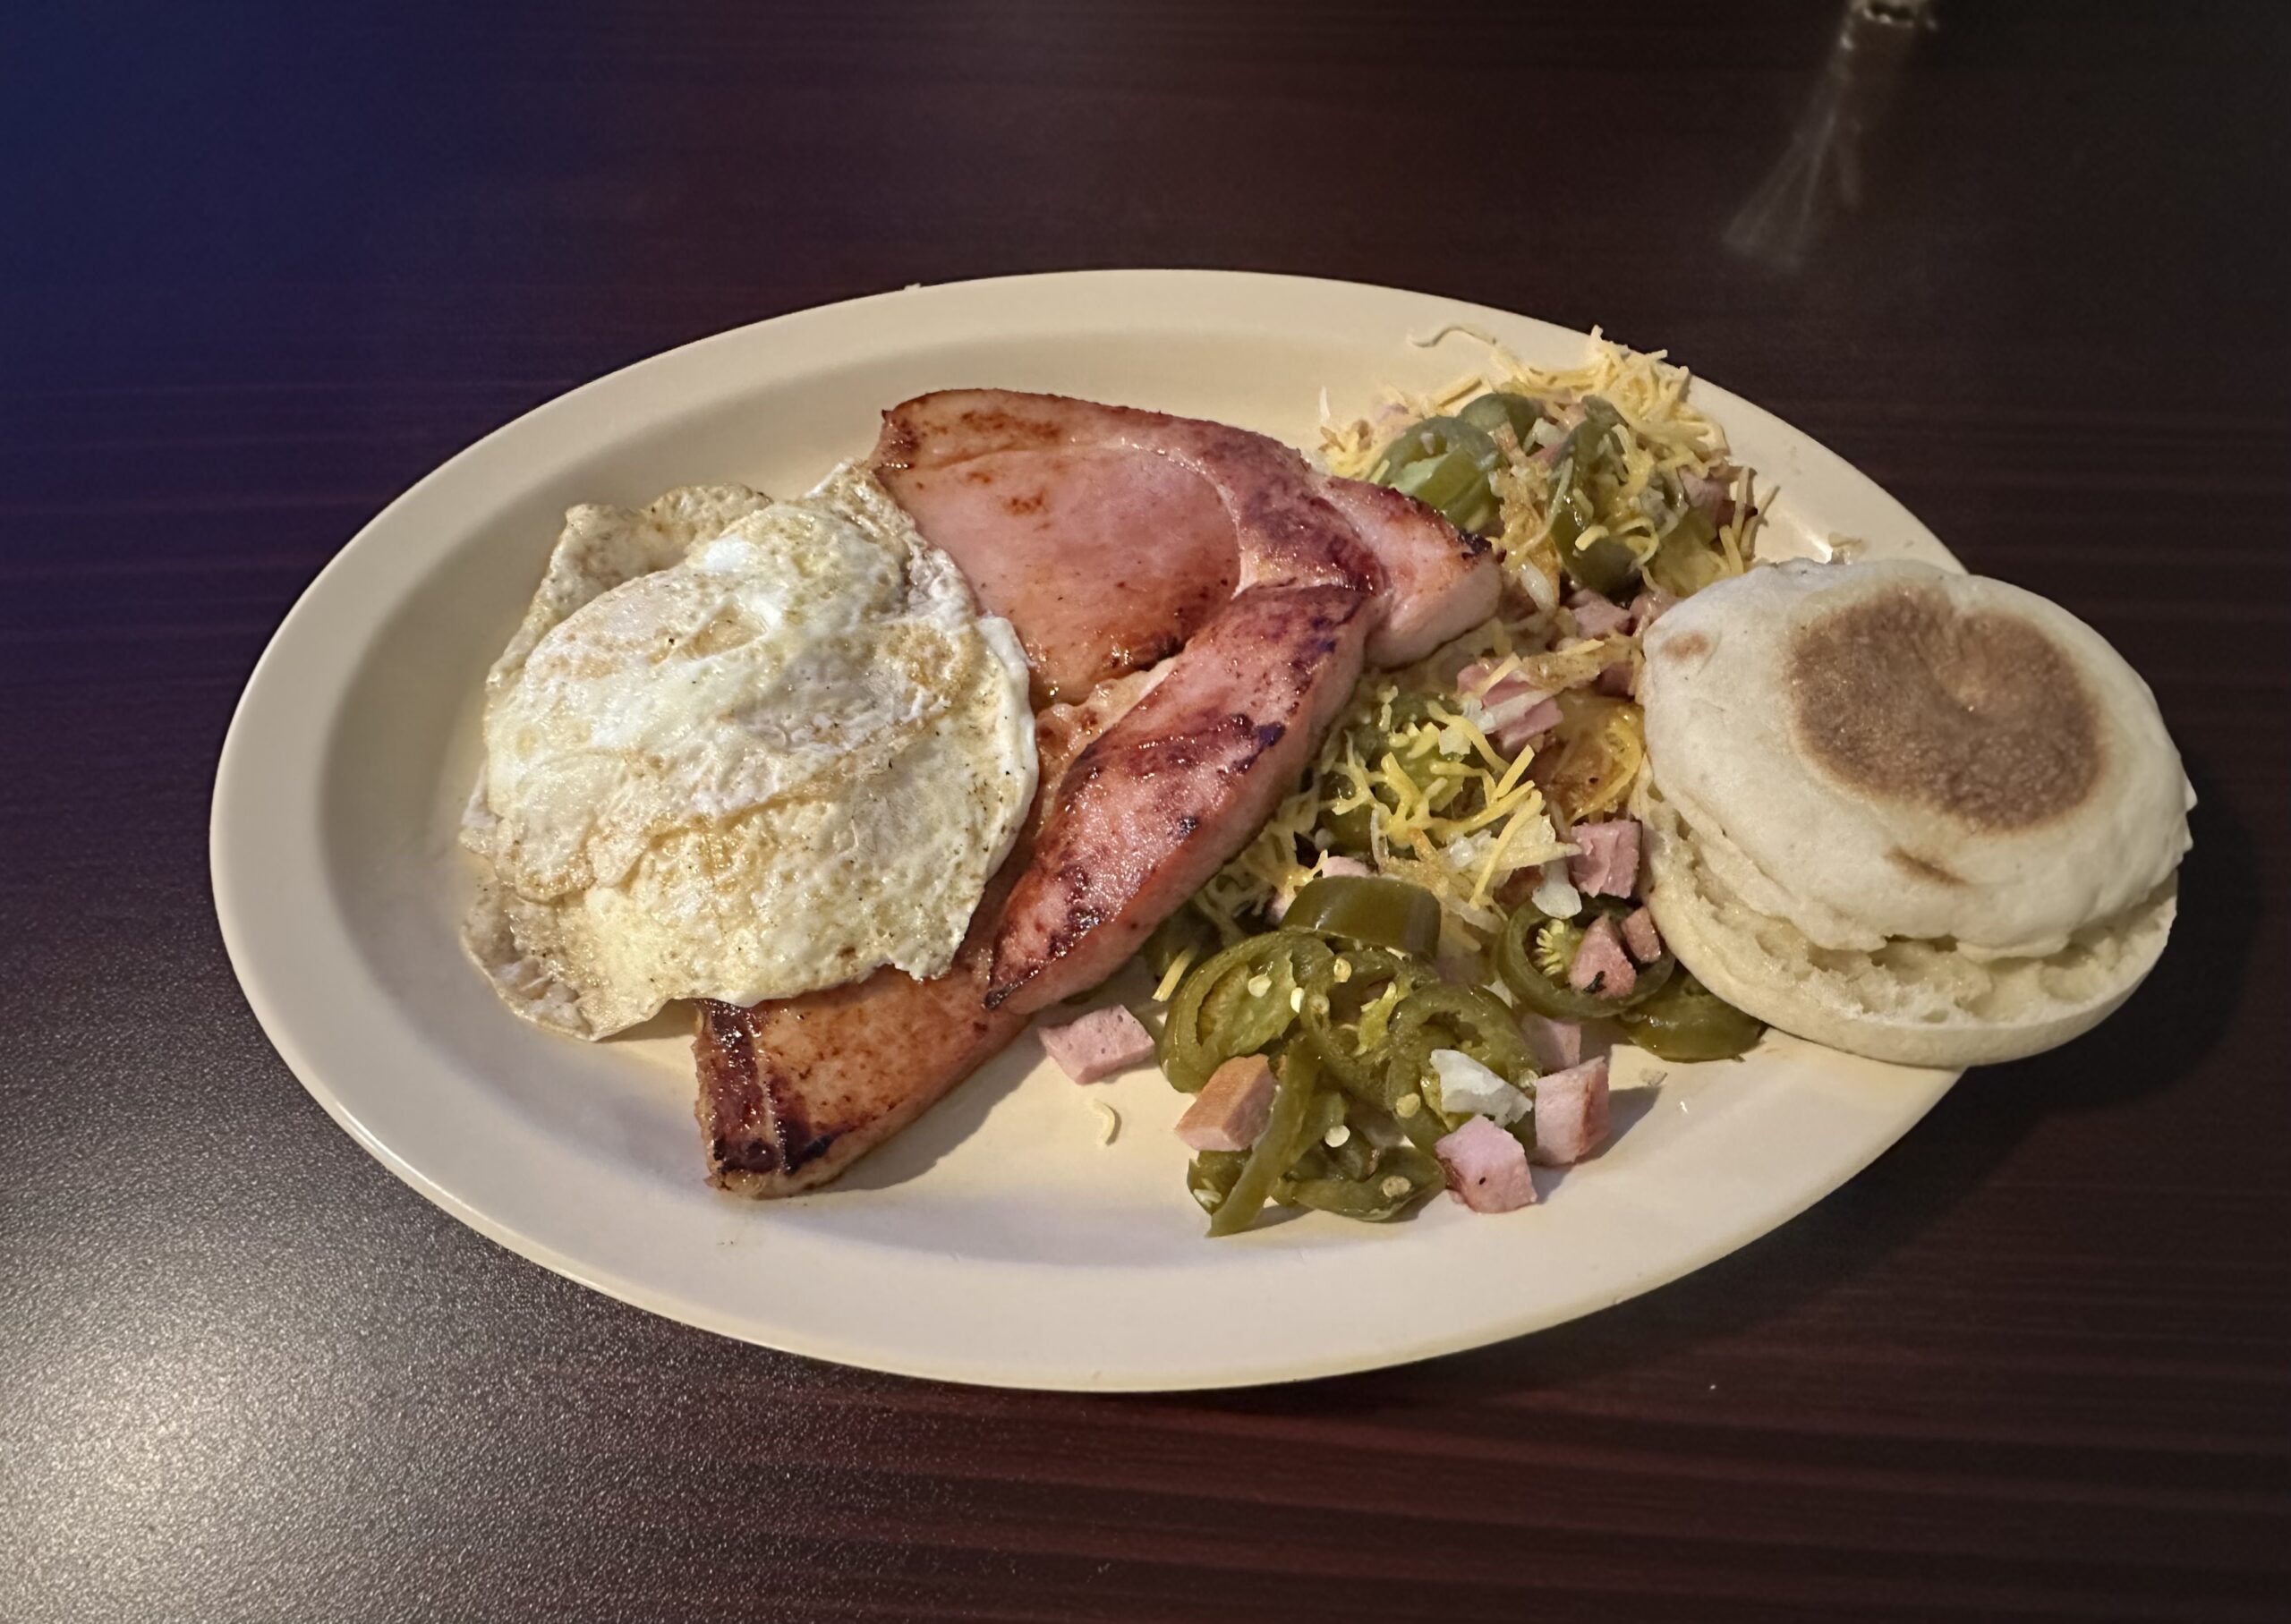
Did the right side of the English muffin really look like that? Unlikely. I could have already taken a bit out of it, and the camera would not know.
There is also a reflection on the table on the top right of the photo. The A.I. tried to make up something that might be sitting there, casting the reflection. But it sure looks … off.
You can use a shovel to dig a hole, or use it to hit someone over the head with. The tool is not the problem. Most of us have sharp knives in our household we use in the kitchen, and never use them as weapons of violence.
Just like a straight edge (ruler) allowed “anyone” to draw a straight line, A.I. tools now allow a bad photographer to take a better (?) photo. Well, not actually take, but “fix it later.”
And the world will never know they are looking at partially fake A.I. generated English muffins.
When I brought up my breakfast photo example on my Facebook page, Reece Piccolo-Sellin showed me a definite use for this technology. He provided me with this version of my breakfast photo:

Maybe I can get behind this technology after all…
Until next time…

I just posted about the JAlbum program I use to make my photo galleries on some of my other websites. Unfortunately, there are some issues that need to be fixed before I can start using them. I wanted to share this for anyone else who might run into the same problems and search for a solution.
First, some terms. The “core” is the main part of JAlbum. My limited understanding is that it does not actually generate the web pages. That functionality is done by “skins“. There are many (MANY) skins available with different looks and features. Some support 360-degree photos, for example, while others do not.
I use the PhotoBlogger skin:
https://jalbum.net/en/skins/skin/Photoblogger
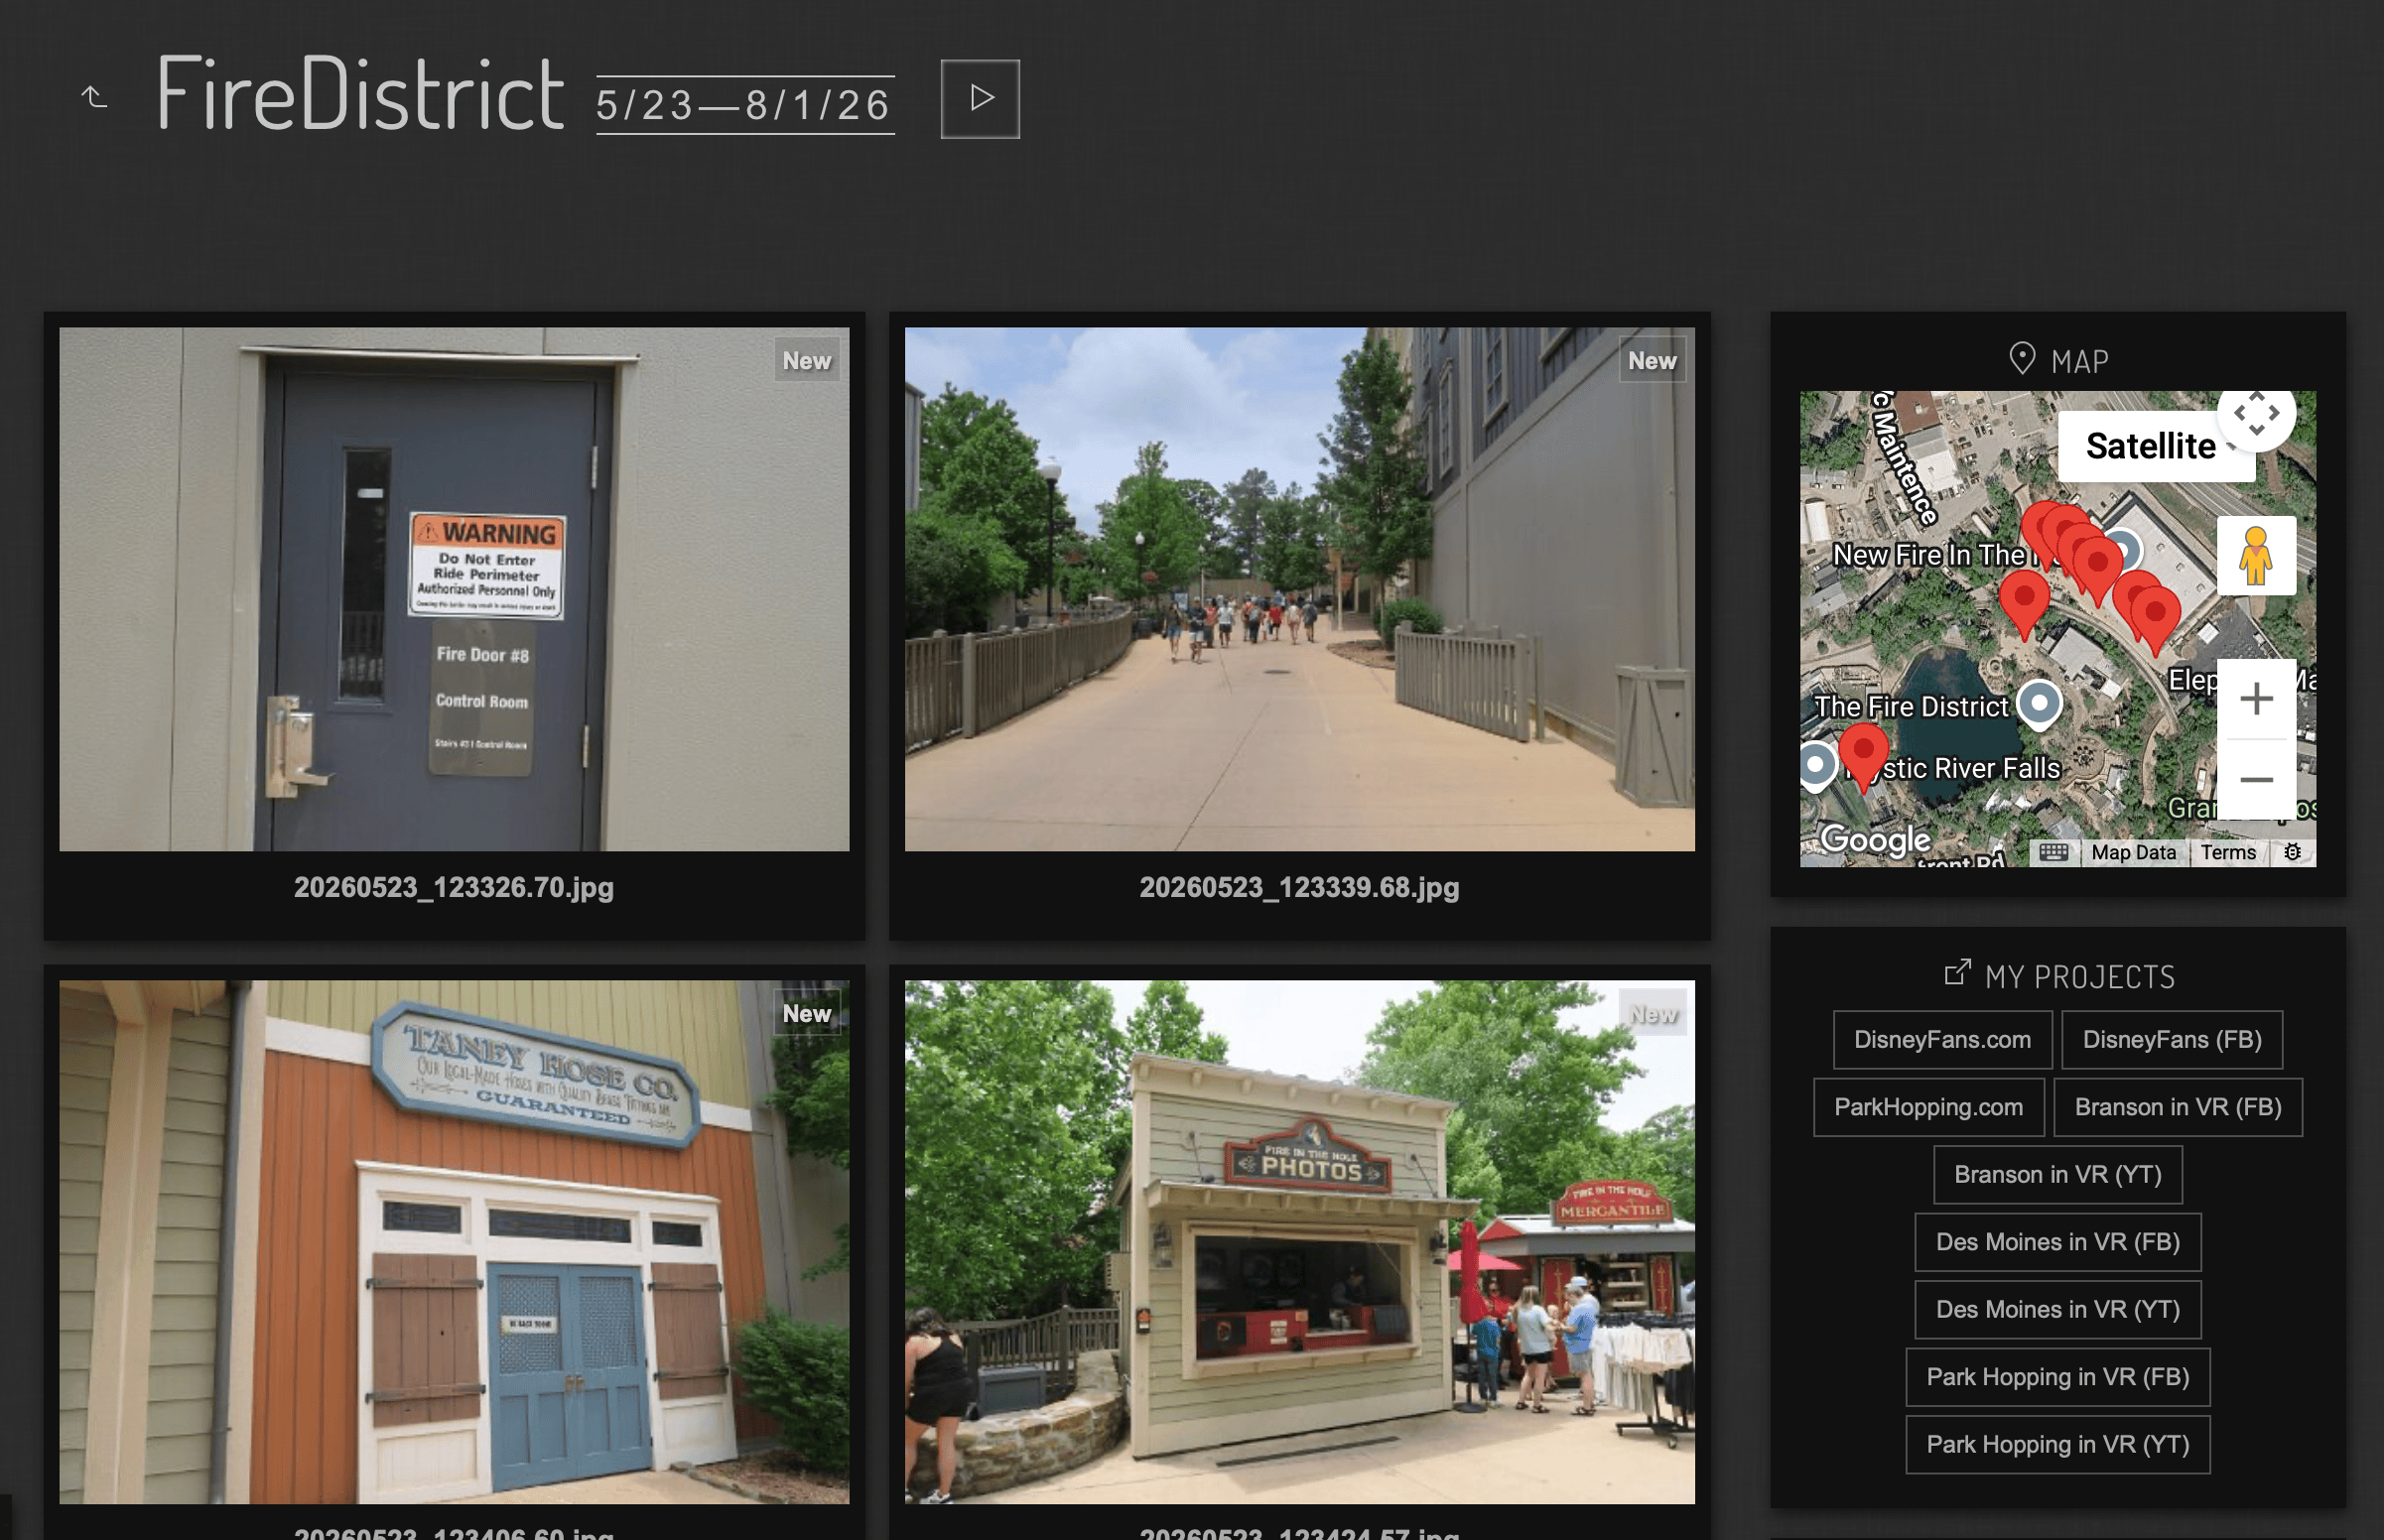
I switched to this because is supports the GPS data I embedded in my photos (geotagging), allowing site visitors to see where the photos where taken. It does this very well:
I recently learned that PhotoBlogger also supports 360-degree photos, so I made a test gallery of some of my images. What I immediately saw was that the images were too “zoomed in” when presented. In the two images below, there left one is the default (notice the magnifier slider at the bottom left is about halfway) versus the right image, which is zoomed all the way out, closer to where the image should be:
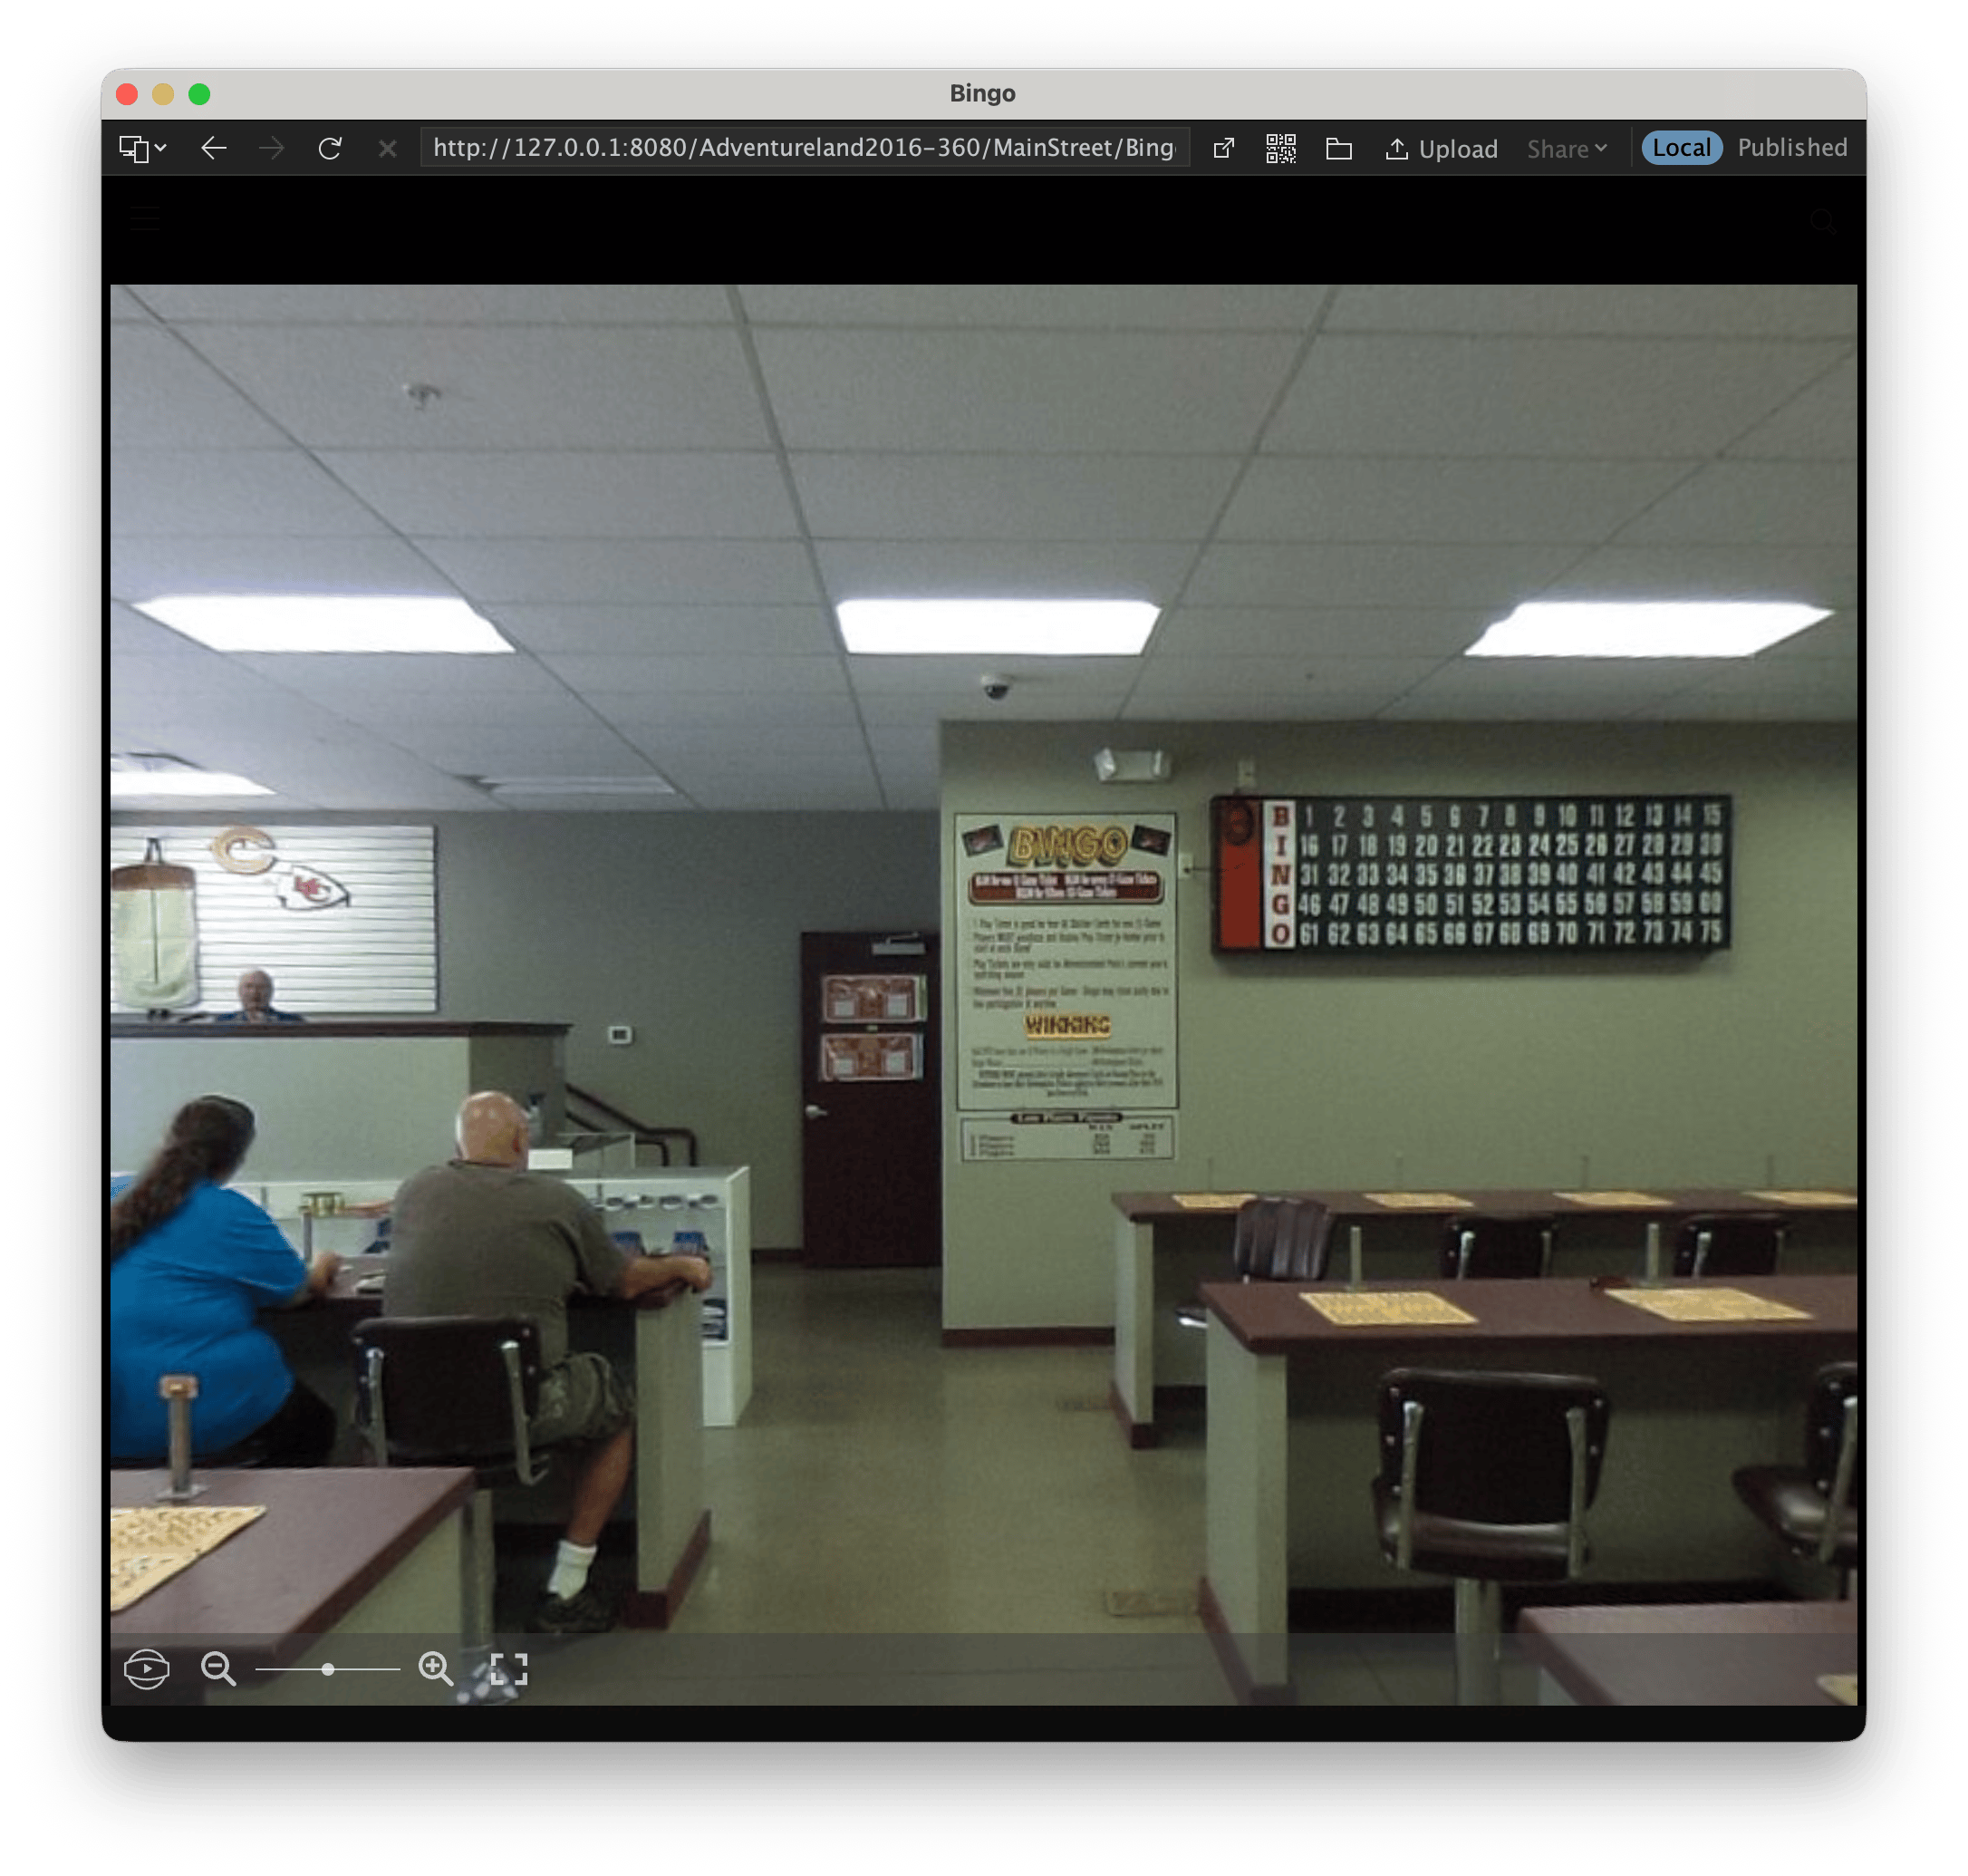
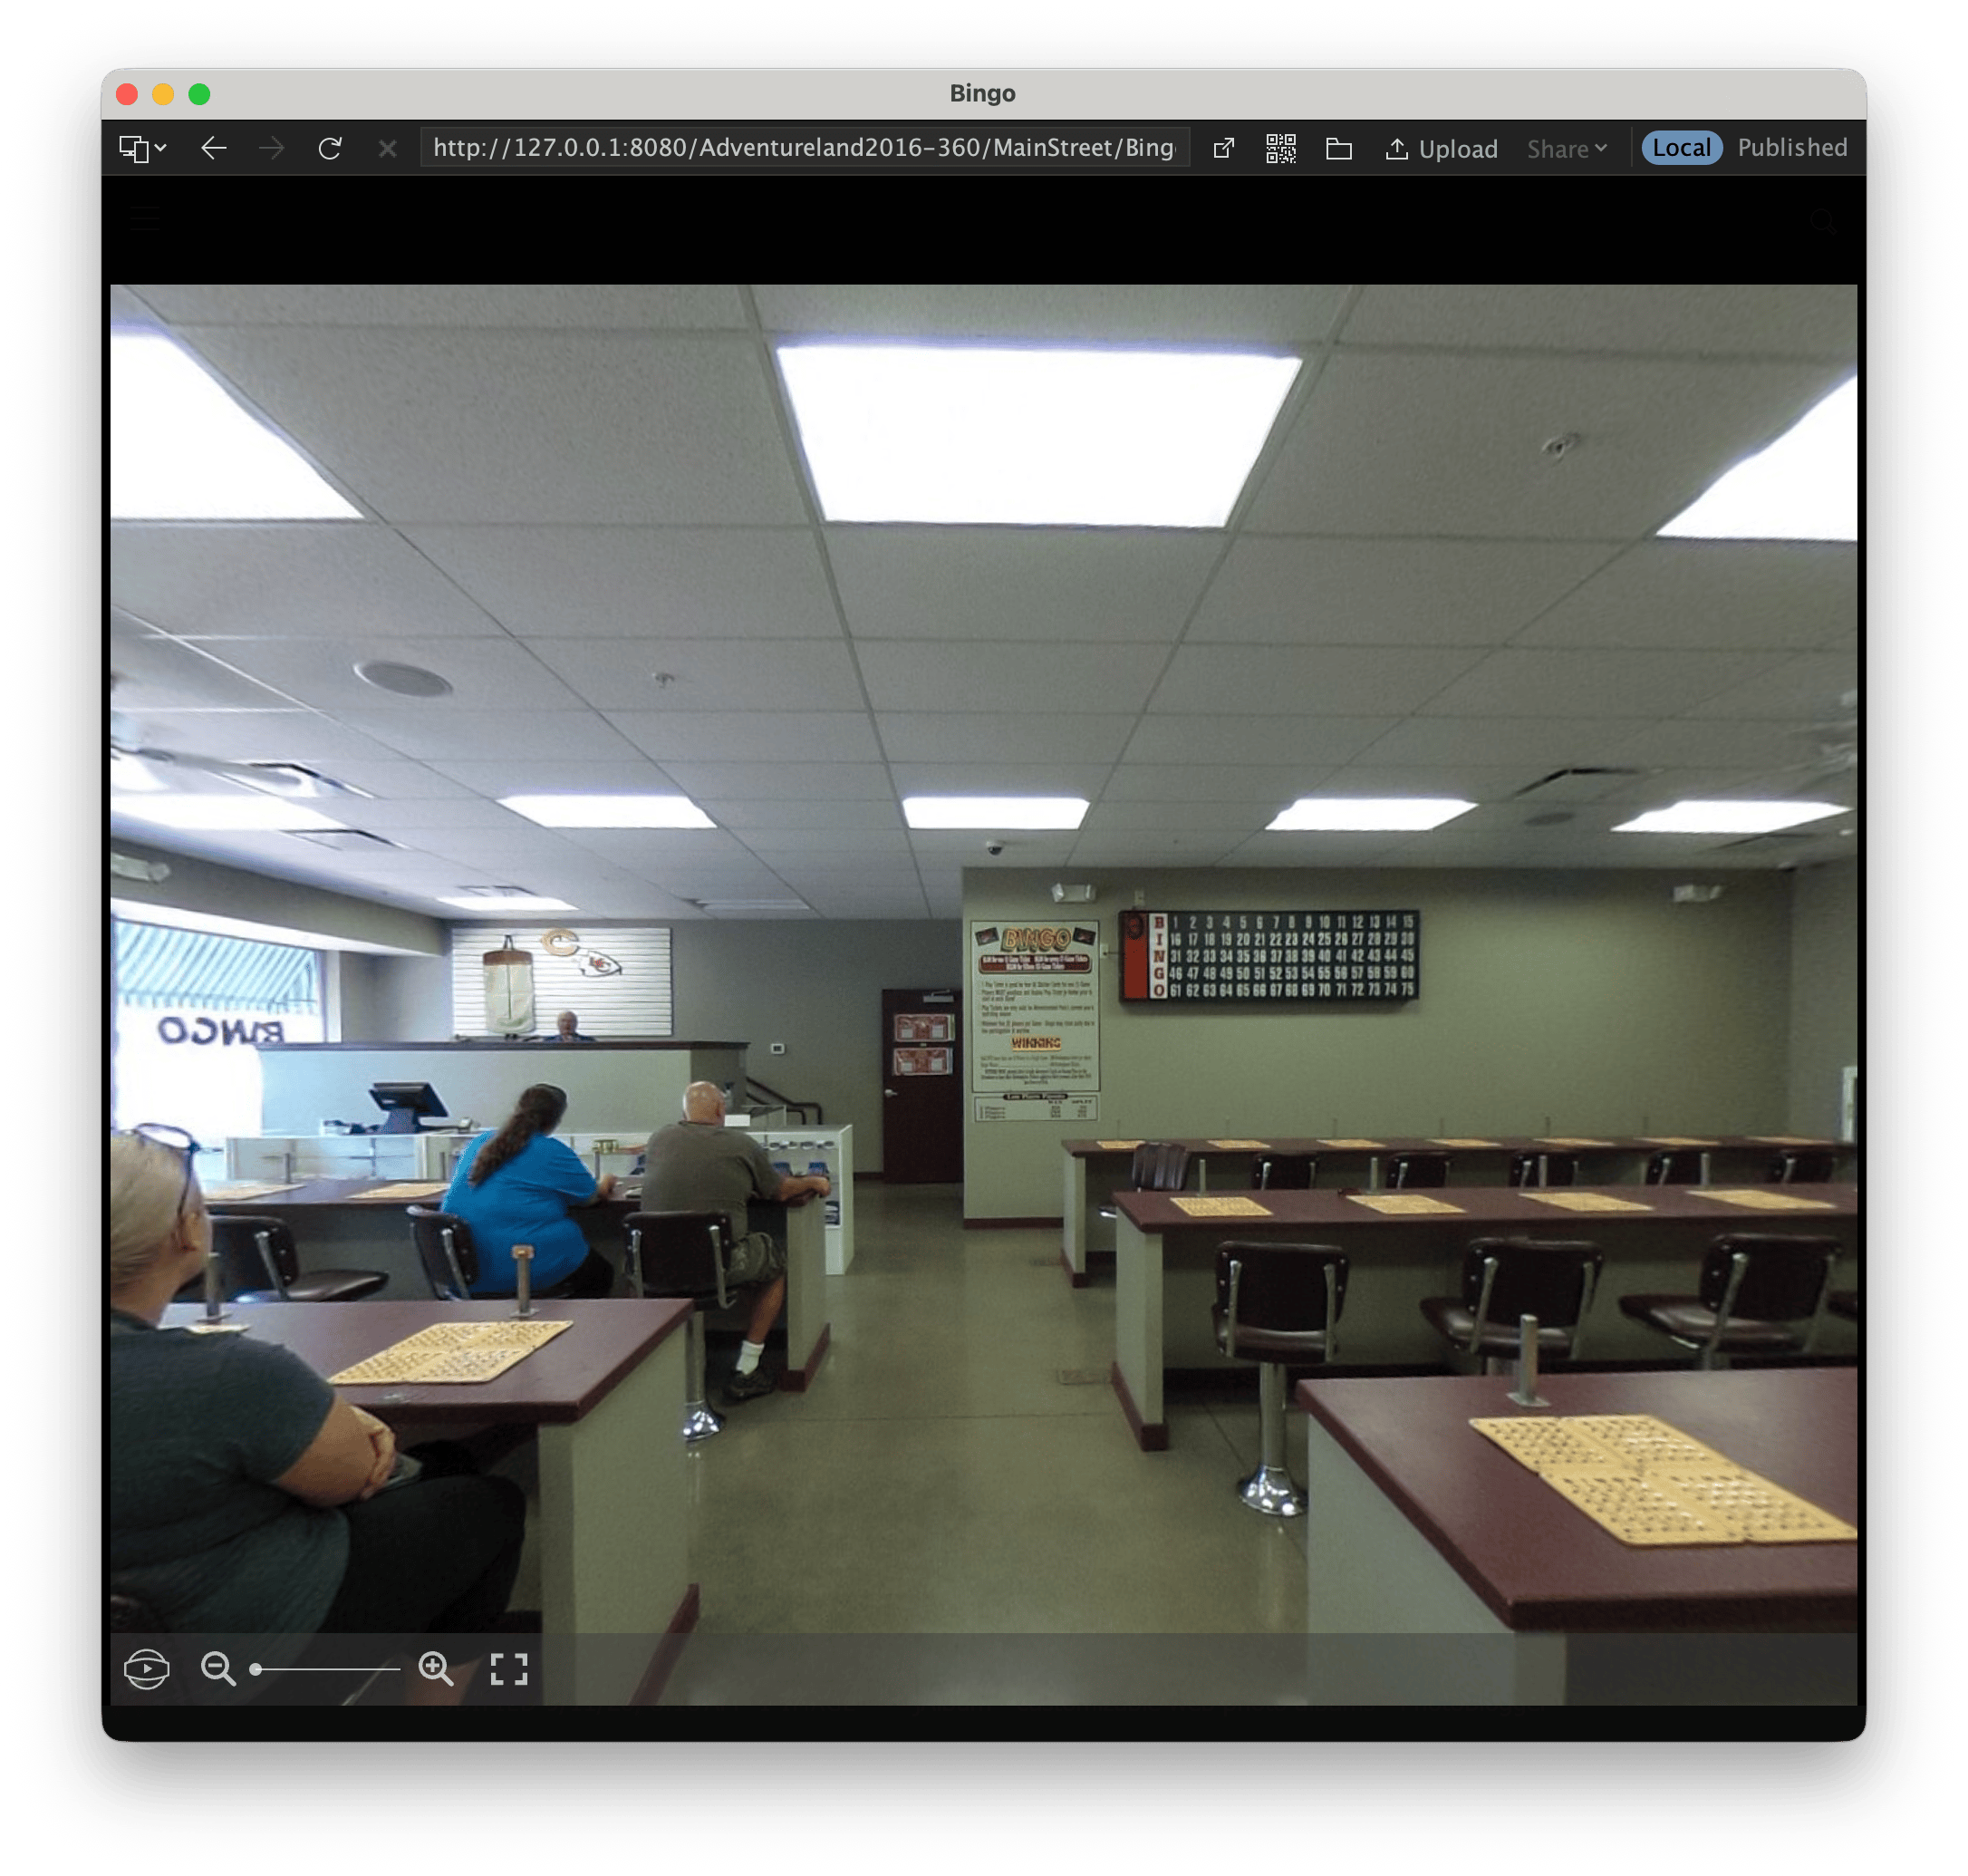
If we assume the slider is 1-100, then the default is around 50. To change this in JAlbum, you have to go to each image individually and EDIT it. When you enter EDIT mode, there is a special category for 360 images:
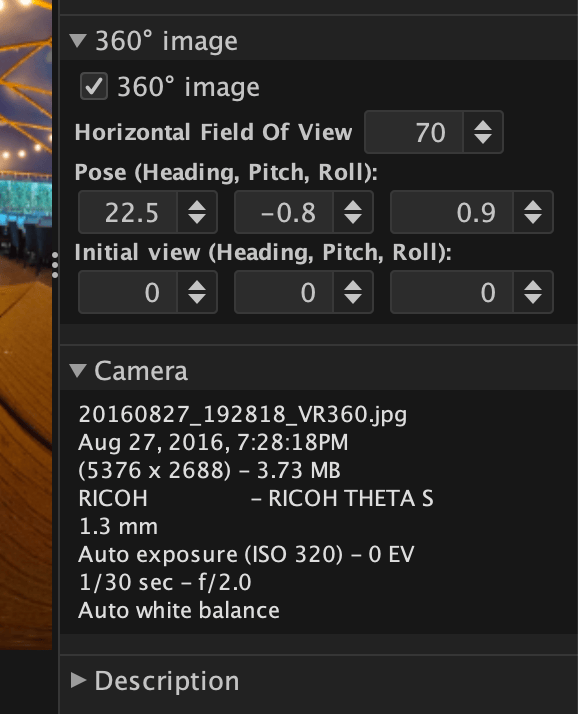
The “Horizontal Field of View” is the value the slider represents. Except, when JAlbum/PhotoBlogger displays them, it puts that slider in the middle. By changing that inside JAlbum, the first “core” but is revealed: it modifies the original JPG file!
Now, there is an option in JAlbum to allow this. In the settings you will find a checkbox (“Write xmp metadata to files”) that allows the program to update metadata inside your files, but even if it is unchecked, JAlbum still modifies the file. This seems to be a bug.
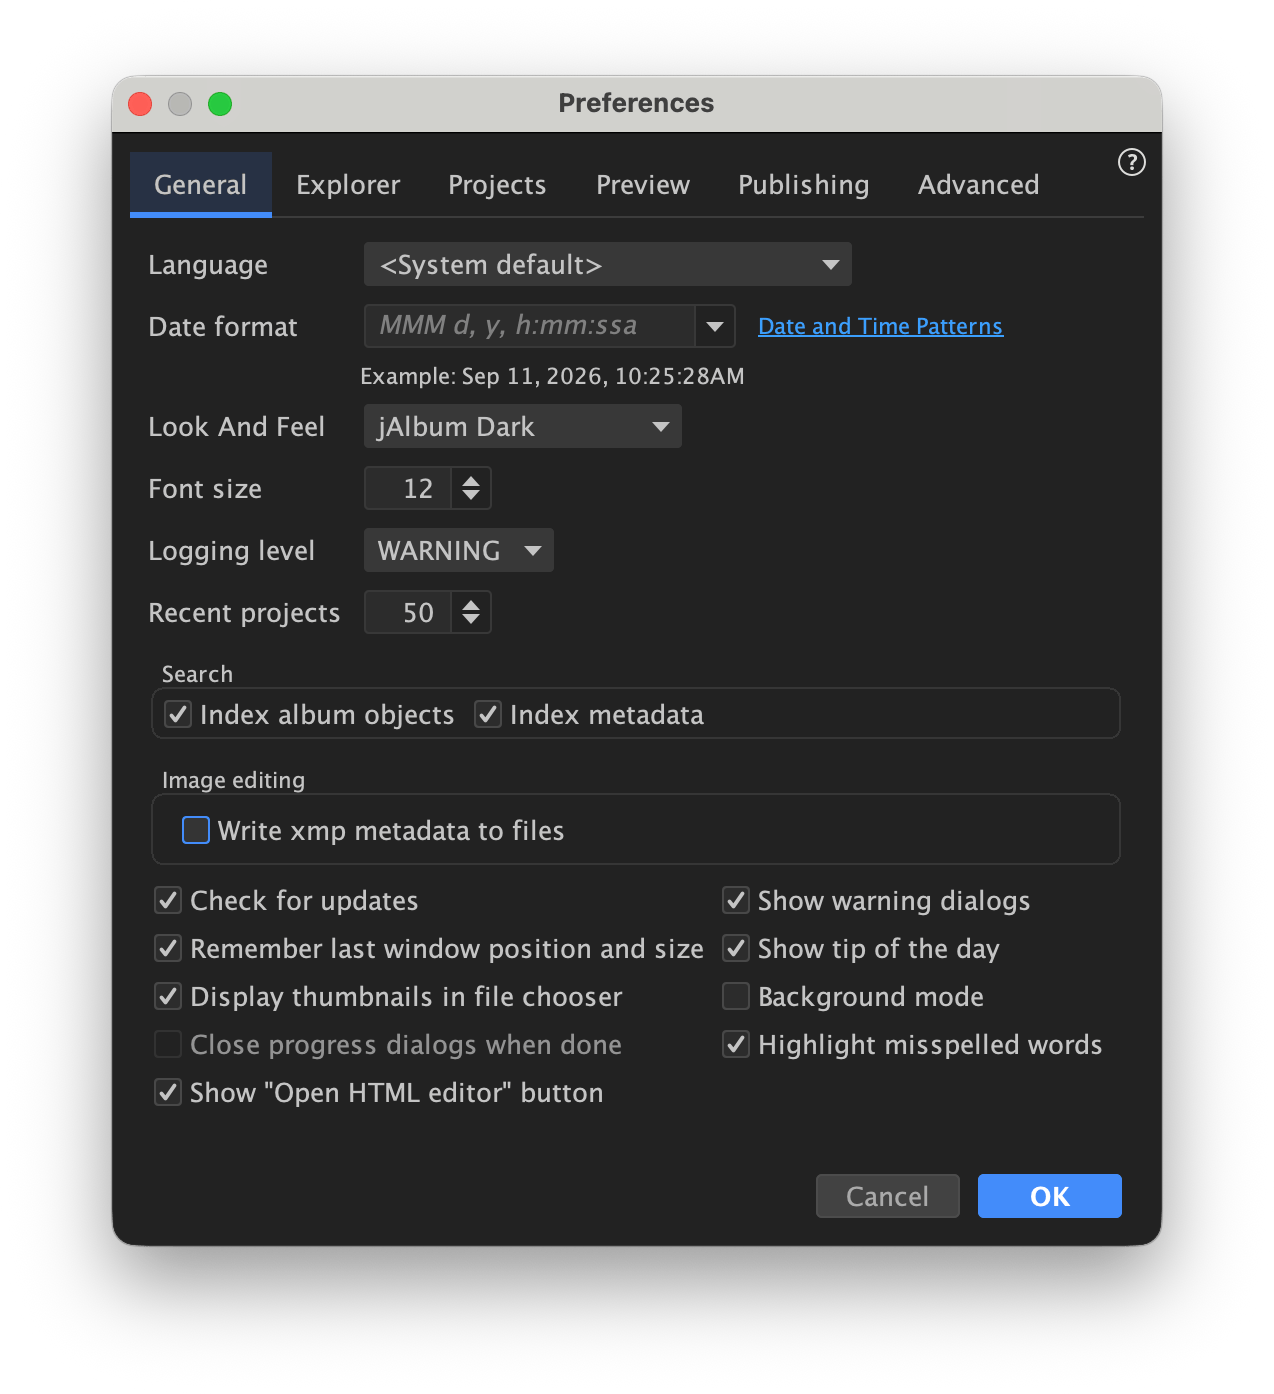
Adjusting the value in the EDIT window will modify the JPG file and add a new metadata entry that (at least in these test images) was not there before. You can use the command line exiftool utility to dump all the metadata as text, and then filter for the “FOV” entry:
exiftool /Users/allenh/Desktop/JAlbum\ 360\ Test/20160827_192818_VR360.jpg | grep FOV

Initial Horizontal FOV Degrees  : 42.0
Above, I had changed the FOV value to 42 inside the JAlbum EDIT screen.
It appears that if this entry is NOT in the JPG file, JAlbum/PhotoBlogger uses some default that is shown as the middle of the zoom slider. If this value does exist in the file, JAlbum/PhotoBlogger’s 360 viewer will use it instead.
And this reveals the second thing that may be a bug.
In order to make the image zoom out in the gallery I had to reduce the value. The smaller the number, the more zoomed out the image will be shown at. I did a test and edited my images to a 1, which might be a bit too far “un-zoomed” but works…
I thought that was the solution, but then if I try to upload one of these modified-by-JAlbum JPG files to Facebook (which also supports 360 images), the result is an image that is zoomed all the way in, like a screen of pixels from the wall or whatever.
The FOV value seems to be handled backwards.
Indeed, if I look in other 360 software, such as Insta360 Studio, the FOV value uses a smaller number for “more zoomed in” and a larger number for “more zoomed out.”


For modern 360 images taken on an Insta360 X6 camera, the Insta360 Studio app seems to show a default value of 88 there — but this changed based on the “View Angle” that is selected. For “Mega”, it is 80. For Ultra, 79. For Dewarp, it is 99. Other values get adjusted to compensate for the fisheye lens. I do not think any of these settings where available in the RICOH Theta camera I used in 2016 for the test images I was working with originally.
Insta360 Studio appears to default to Mega with an 80 FOV for images that have not been edited yet. At least, that is what the UI shows. But when I export them as 360-degree JPG files (the camera uses a proprietary .insp format), I see this reported by exiftool:
exiftool X6-test.jpg | grep FOV
Initial View Vertical FOV Degrees: 95
Initial Horizontal FOV Degrees  : 100
This tells me the old RICOH software did not put this metadata in, but modern Insta360 software does. And when I process an X6 image with the Horizontal FOV set to 100, I see the JAlbum/PhotoBlogger slider set all the way to the right – as expected:
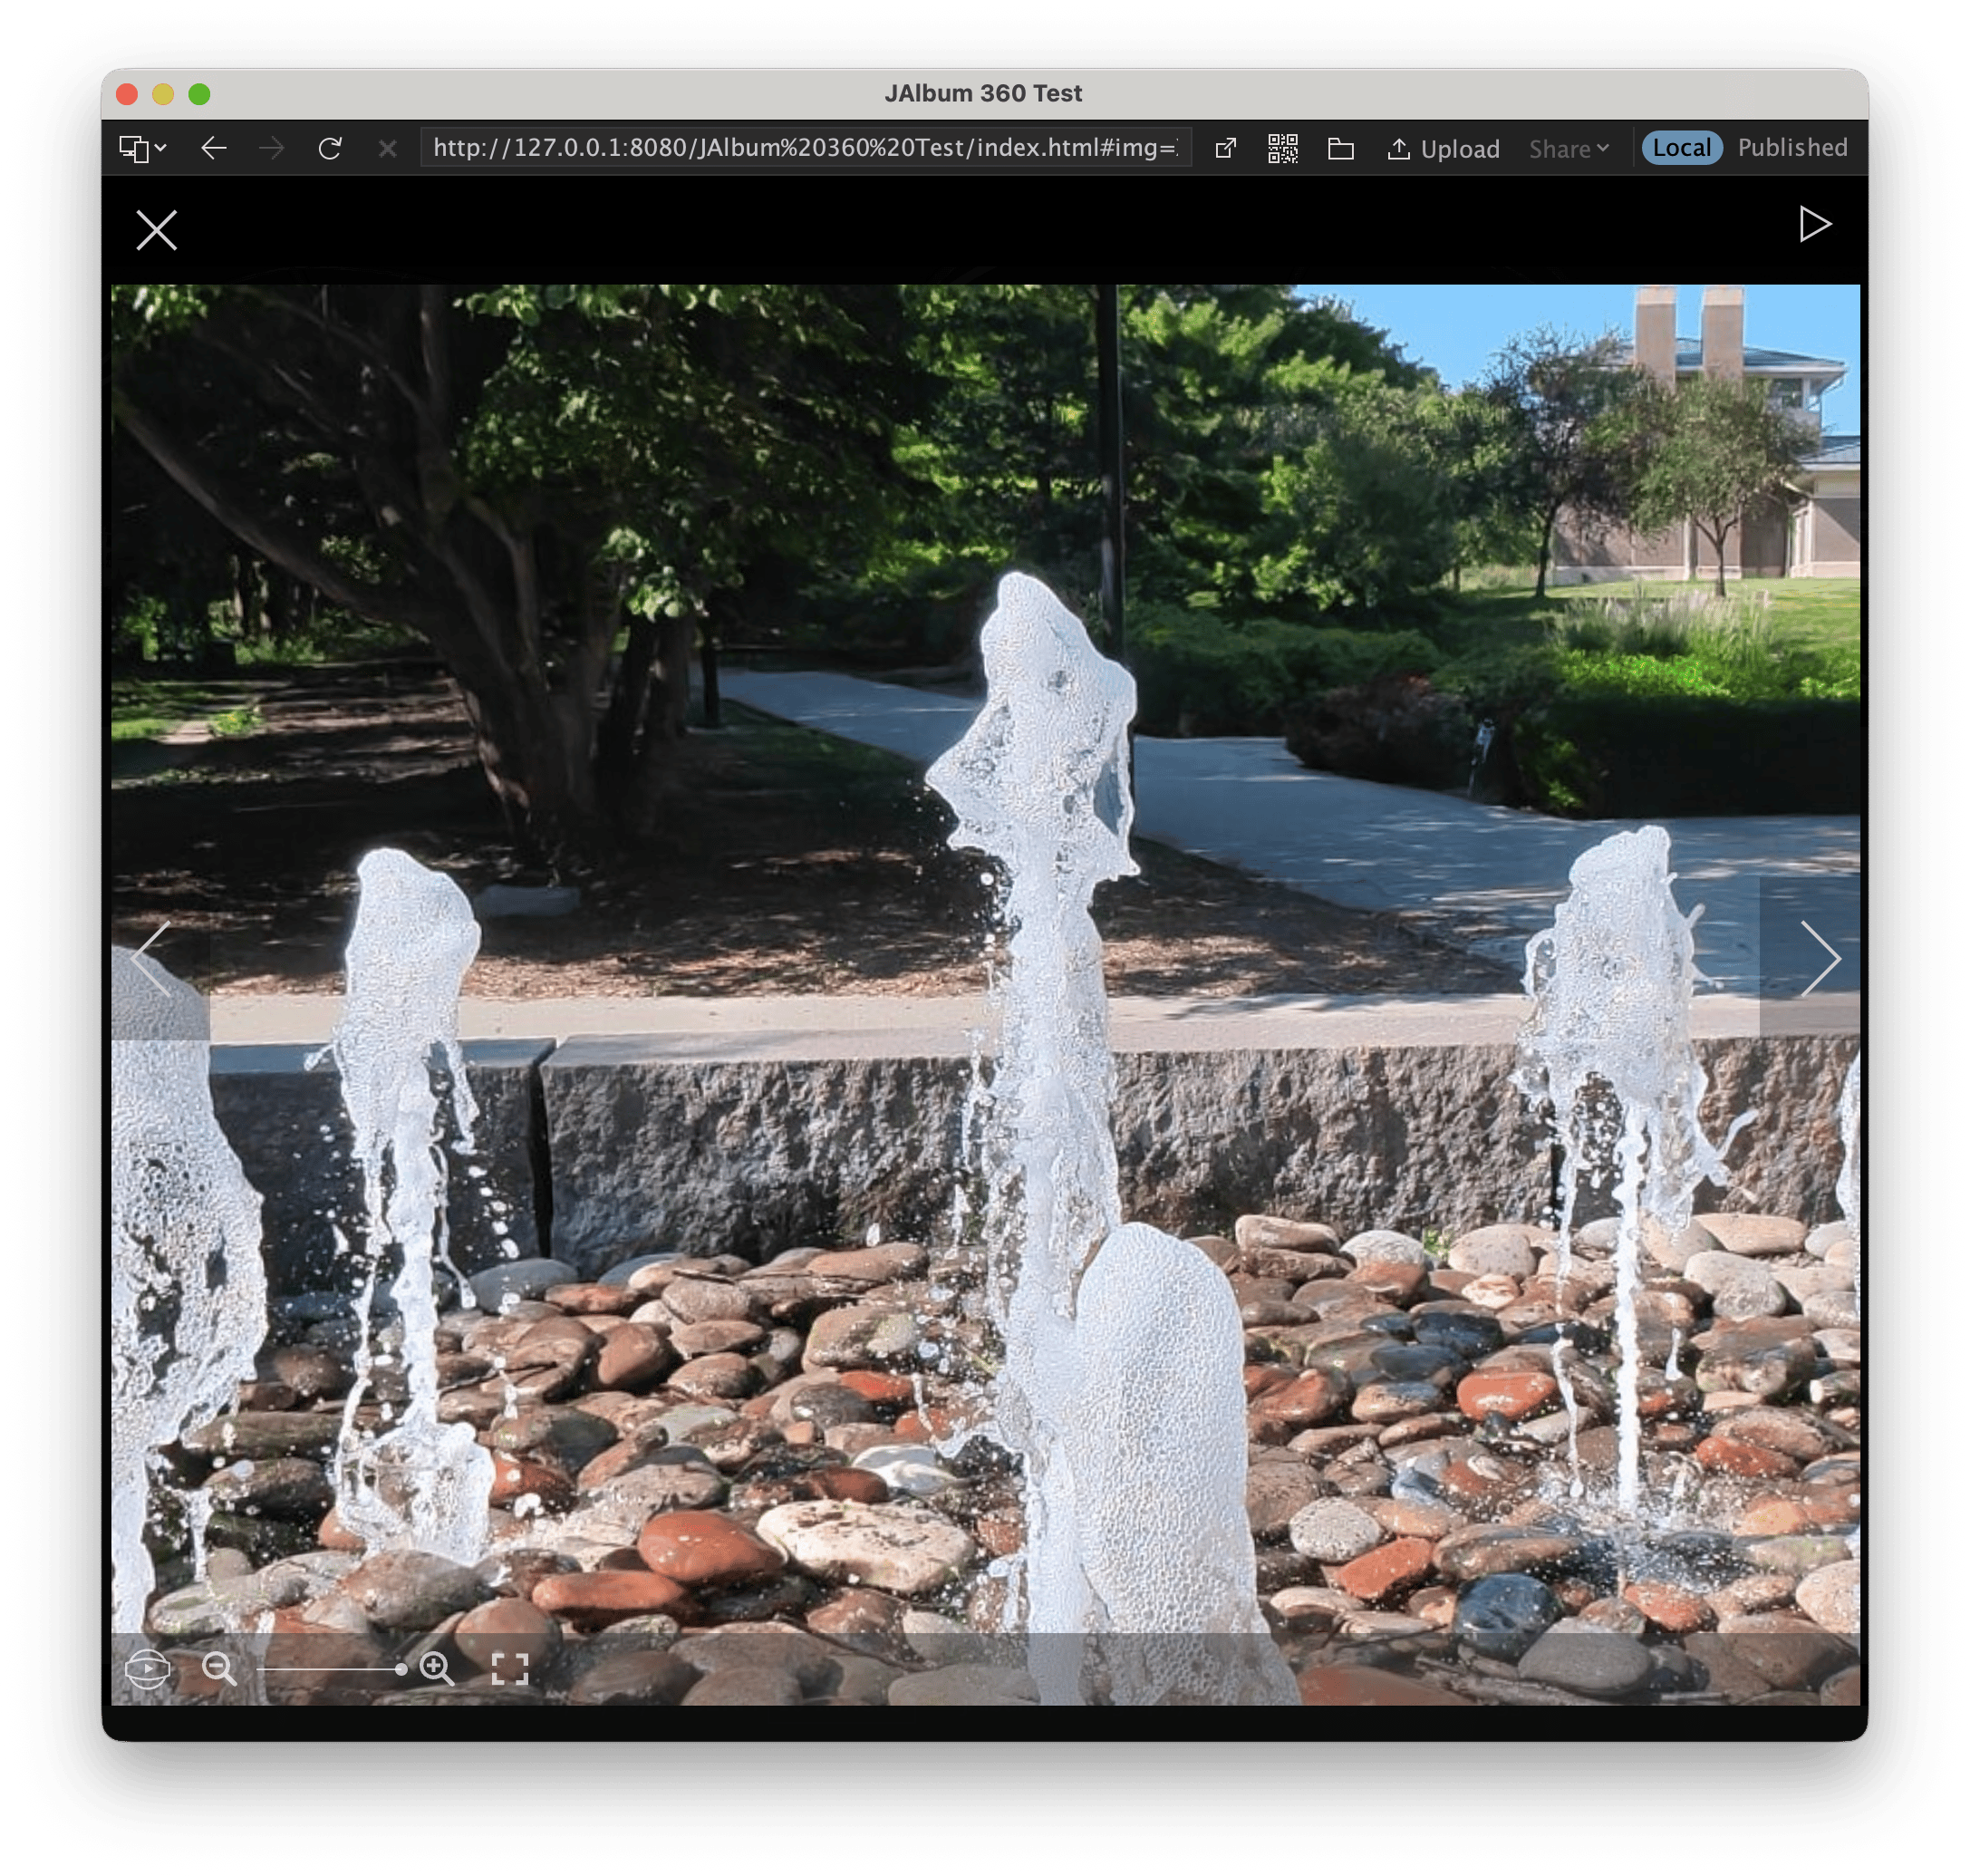
This is too zoomed in. But upload the same file to Facebook gives a zoom level that works nicely:
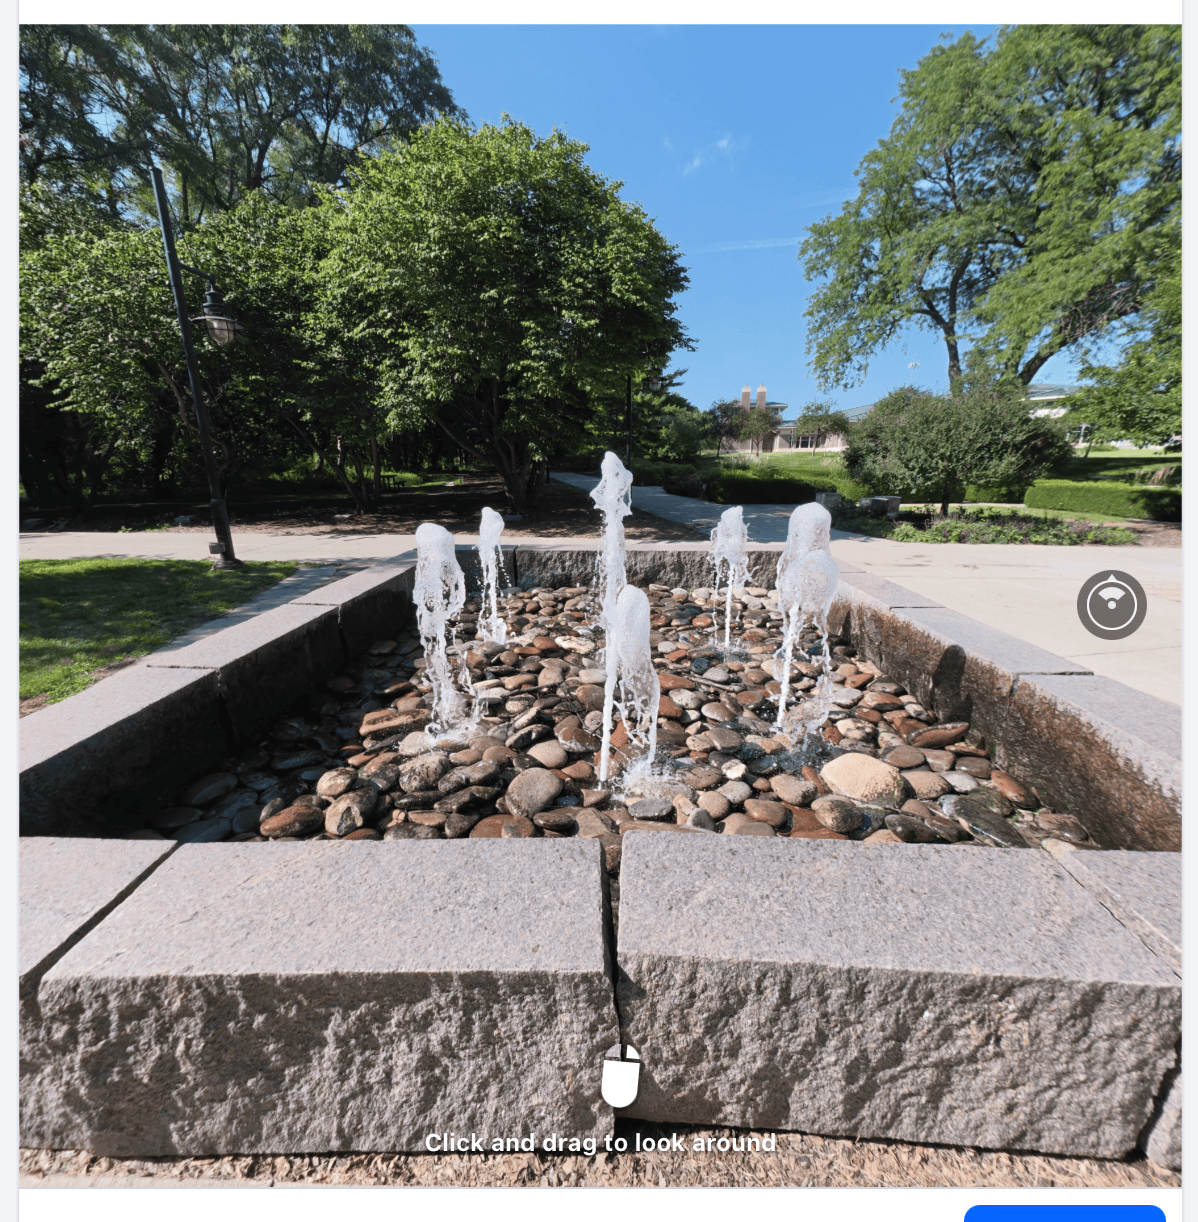
I do not know what Facebook is choosing for the default Field of View, but it is clearly different than what JAlbum does with the same file.
I am unsure if there is a workaround currently. If I modify the image file so it renders properly on JAlbum/PhotoBlogger, I get an image that will NOT show up properly on Facebook and other places that support 360 images (assumption; I have only tried this on FB as of this post).
There are some very helpful folks in the JAlbum forum that have been looking into this. Perhaps a part 3 of this post will follow, once a solution is figured out.
Until then…
…other than anyone who ever read the fine manual.
UPDATE: I have since learned that this does not work as it should. I have a follow-up post on 9/12 that explains what has been figured out. As of right now, the below information is not entirely accurate…
Since 1996 (when I got my first digital camera), I have been sharing digital photos online. Mostly, these are from my old theme park site, DisneyFans.com. I have a less ancient site (*cough*, WordPress Blog) over at https://parkhopping.com which has links to my various photo galleries. I think I have well over 300,000 photos online at this point.
Every photo gallery program I have ever used has eventually stopped working for me as my galleries grew too big for them to handle. Originally, I created them on a Windows PC (back in the late 1990s) using some Java program and DOS-based utilities and such. There really was no good software for this in those early years. Heck, the thought of having more than a few dozen photos on a “personal home page” was ludicrous back in the days when sites like GeoPages (later known as GeoCities) offered you 512K (yep, K) of storage.
But I digress.
For the past two decades I have been using this free (well, it used to be; I think you have to buy it now) cross-platform photo gallery program – JAlbum:
It works great. And I only recently learned it even supports 360-degree photos. As a test, I took a batch of photos from Atlas9 in Kansas City, KS and added them:
https://www.disneyfans.com/photos/misc/OtherPlaces/Kansas/Atlas9/360/index.html
Now I can share these images without having to use Facebook to do so. Check them out. It’s cool.
Or don’t. No biggie.

Recently I posted about a new HTML-based CoCo 1/2 emulator named Varispeed. The author has since set it up online so you can try it out from a web browser. This may be easier for you than downloading the files and opening them in your browser locally. Check it out:
Consider Oscar’s video here a funner version of my out-of-date selfie stick blog post:
Well, not at all a vocoder, but it did sorta remind me of the way the Daleks sounded on Doctor Who.
During my years of isolation in deep East Texas in a tiny town with a population of 225, I had the only CoCo around. In fact, I may have had the only home computer that wasn’t at the school. I remember discovering (or maybe reading about this in Rainbow) how you could use the AUDIO command to create some weird effects as you played a tape through the cassette drive (I did not have a disk drive at this point).
Knowing what I now know about BASIC optimization, I present this bit of code:
0 AUDIOON:AUDIOOFF:GOTO
Stick a tape in the tape drive, press PLAY then type “MOTOR ON” to get the tape rolling, then RUN.
I learned I could open the tape door on my Sears (I think) cassette recorder and then hold down something inside and click REC-PLAY to put the tape player in RECORD mode. I could then speak into the microphone and it would send the output to the earphone jack into the CoCo, allowing me to use it like a microphone. I could turn up the volume and talk into the microphone and hear the distorted audio come out of my TV speaker.
Ever tried this?

UPDATES:
When Insta360 first started their cloud service, I was invited to participate in the beta process before it was announced to the public. At the time, I simply tried to use it to back up my camera files via WiFi. While it worked, and was GREAT for photos, it was far too slow to be useful as a backup of large video files. I would let it sit all night and it was still uploading video the next morning.
Suggestion to Insta360: If the user could set priority (i.e., upload photos first, then videos), that would be helpful. This would allow us to quickly get the photos backed up and ready for sharing, if that was important, instead of having them mixed in with the slow video uploads. (Perhaps “upload photos, then videos” or “upload smallest files first” or something.)
Insta360+ does make sharing 360 content very easy, and this could be worth the subscription to some. You can’t just sent a 360-video or 360-photo for a friend and expect them to be able to view it. They would need special software. Likewise, while Facebook and YouTube support 360-video, there are plenty of people that refuse to use either service. Being able to just send a link to your 360 stuff via Insta360.com is quite convenient.
Since my main use would have been for a safety backup while on vacation, I let my subscription lapse. But am I missing out on more benefits?
Insta360+ is more than just a cloud drive for backing up and sharing your 360 footage. If you look at the description, you will see it comes with additional benefits:
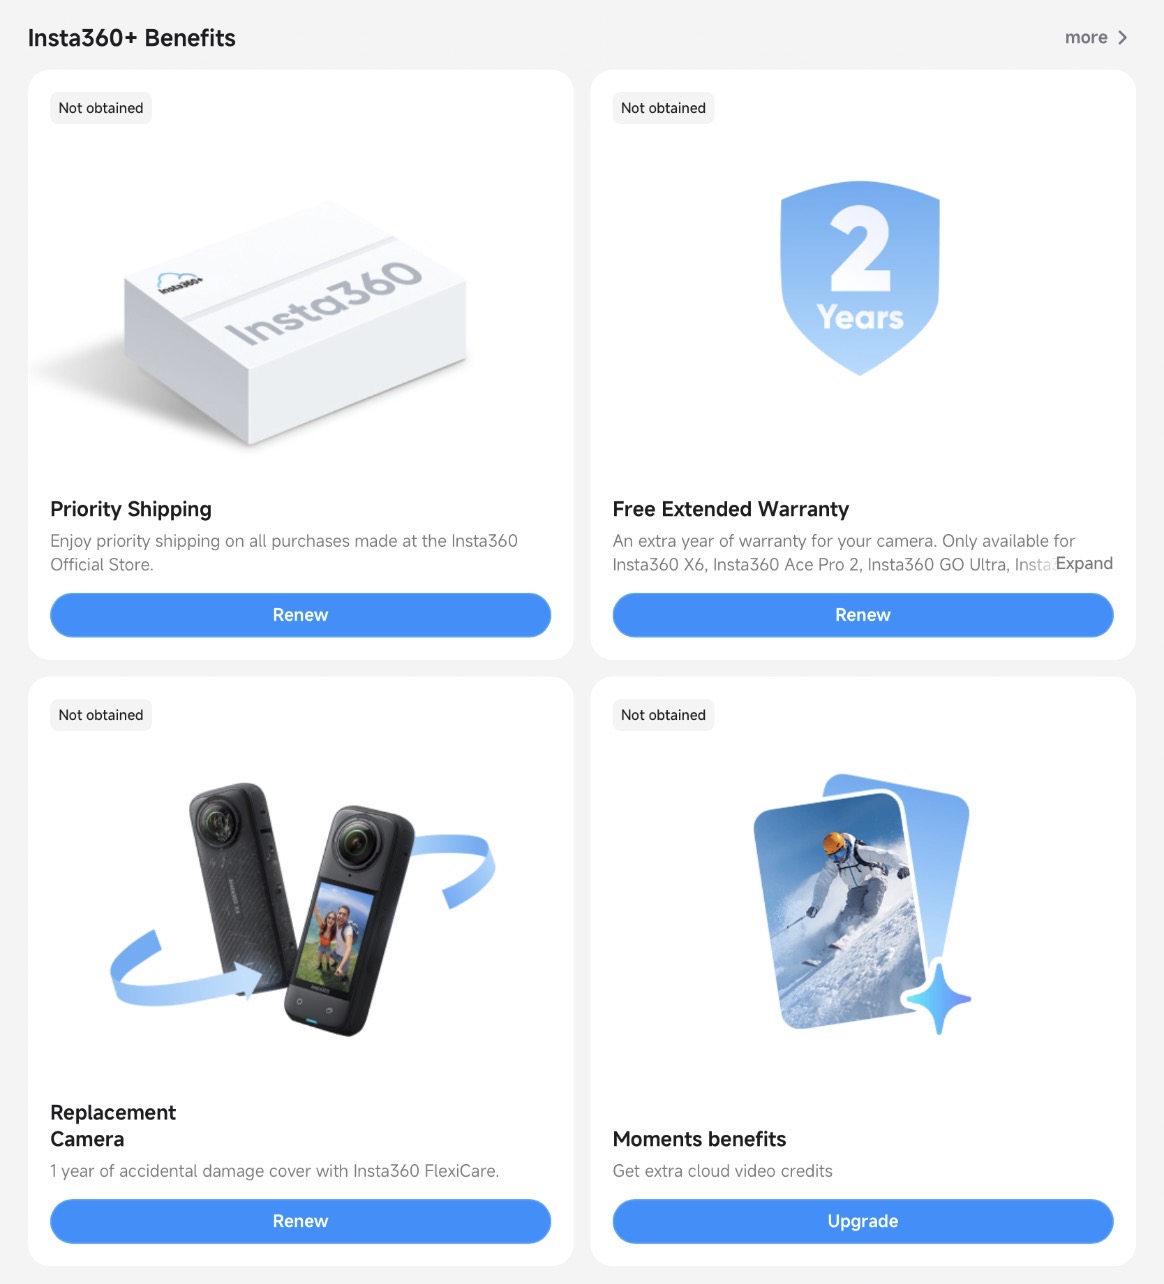
If I understand this correctly (update: I did not), to buy just the warranty and FlexiCare would be $92 (when not on sale; it is sometimes discounted like it is for the Labor Day Sale currently). But, a year of Insta360+ is $30 for the X6… Two years of that is $60, which sounds like this would provide the extended warranty and FlexiCare during that time — saving $32 over just purchasing those items separately.
The “fine print” is shown when you actually look at the various plans. Insta360 support sent me this image:

So while the $29.99 plan would get you priority shipping and Extended Warranty plus cloud storage, helping offset the cost of their service if you already planned to extend your warranty, you don’t get the FlexiCare “replacement camera” service until you hit the $89.99 year plan.
That said, with FlexiCare+ being $60 on the X6, if you were buying that full price, one year is $50. That means you could buy the $90 one year Insta360+ service and basically be getting that $60 FlexiCare+ plus only $30 for a year of 1 TB storage. Not bad!
Keep in mind, two years of FlexiCare for the X6 is only $75, so comparing $75 for just FlexiCare with $180 for two years of cloud service makes the deal less of a value.
Also, there’s this in the FAQ section:
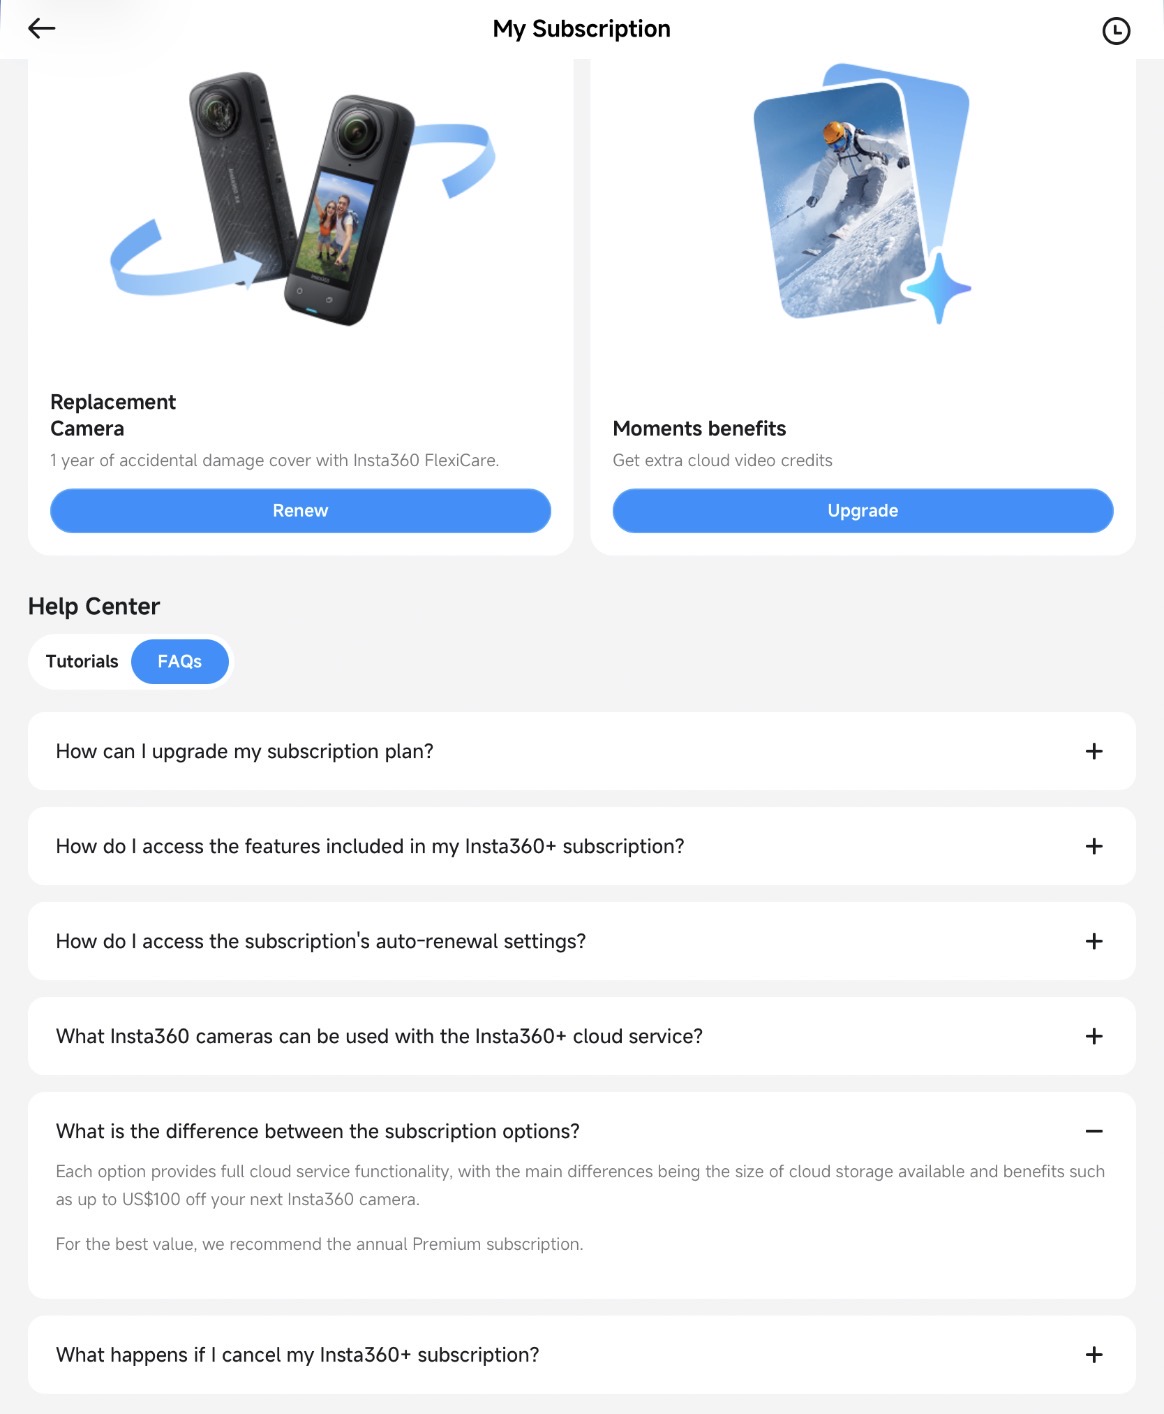
Now, I know it says “up to” $100, but I am curious… if I had been subscribing at the time I bought my X6, how much of a discount would my $30/year plan have saved me? Perhaps the discount is larger based on the tier your subscribe to?
I will update this page with such details when I have them.
UPDATES:
Thanks to this Facebook forum, I now understand the issue. “It was file size all along!” The confusion came from finding out that not all graphics conversions are the same — very similar to a previous problem I reported on dealing with images that can crash Final Cut Pro on an M4 Mac (Apple bug report).
My original error was thinking that recompressing to make a file smaller would work ;-) Turns out, it depends on what you use! Some conversion programs create files that Facebook will reject (just like the other bug where some conversions create images that the M4 crashes on, though the M1 handles just fine).
Proven to work is GraphicConverter for Mac:
https://www.lemkesoft.de/en/products/graphicconverter
And Affinity Photo.
So if your image is too later (somewhere around 66MB), Facebook will reject it. Just use a program that lets you open the JPG and save it back out, then try that. When I first did that, and the smaller file still did not work, I assumed it had to be something else — meta data or whatever.
Turns out, if you use a conversion that works, then getting the file below whatever 66MB limit Facebook has does work.
So if a file is rejected, try to open it then save it out in a graphics program. That saved out version may work or may still be rejected. (Apple Preview, for example, won’t save out a JPEG in 10-bit color, so I did not try testing its result. Quick Actions made a file that was rejected.
Your milage may vary! But it is just as simple as “make the file size smaller” and “make sure the program you use to do this makes a file that works for Facebook.”
Try :)
Has this happened to you?

The Insta360 X6 exports 360-degree photos at 15520×7760, versus the X5 at 11904×5952. The file size is also larger, with images around 76MB versus around 30MB on the older camera.
When I first tried to upload an X6 image to Facebook, most worked, but a few would error out. They were large files, so I tried compressing them down (same image size, but reduced file size) thinking that was the problem. This allowed me to upload them. Problem solved.
But then I had this batch of five images… All fail. Even when I downsized the files to around 26MB each, Facebook still rejects them.
It is clearly not the resolution, since some work.
It is clearly not the file size, since some work.
Does anyone know what the rules are here?
If I figure it out, I will update this post. Until then…

Behold, in all its VHS glory:
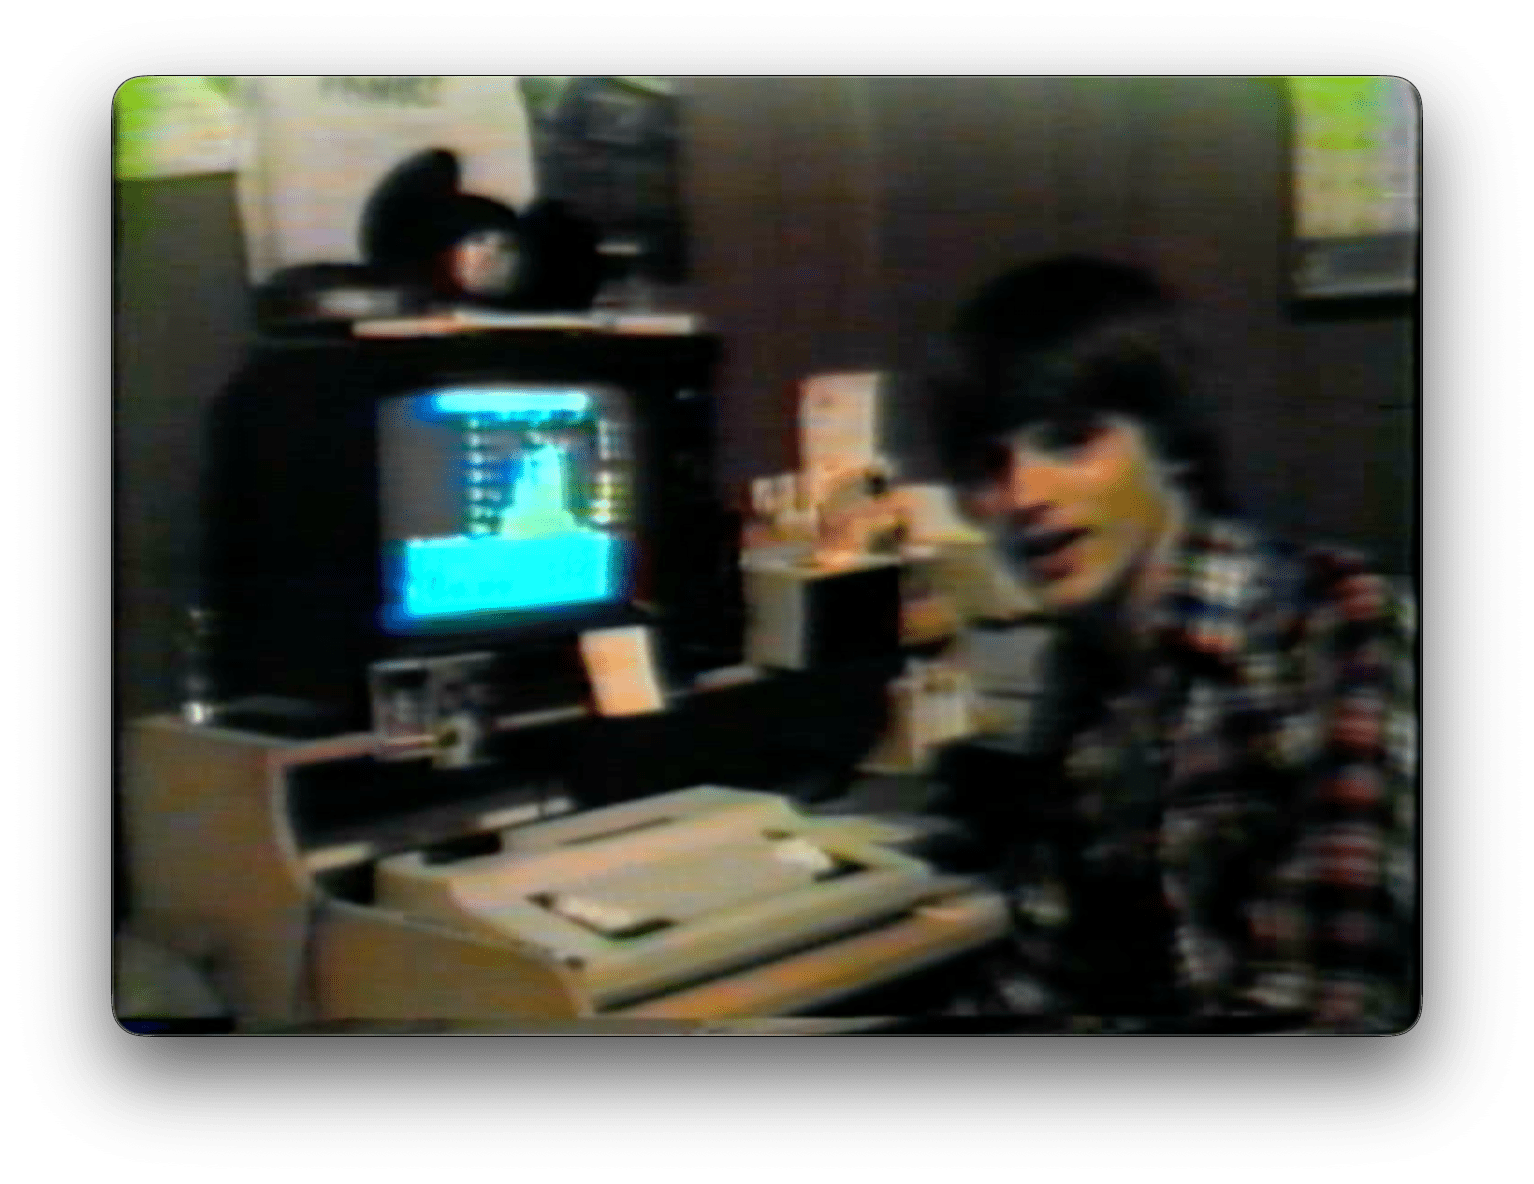
This screen grab came from the intro to a video project I worked on with a high school friend that year. I had only captured the intro titles, and not the rest of the content, but a few frames of me doing an intro were at the end of it.
I was living in Pineland, Texas at the time (population 1111 if I recall). While I had been active on the BBSes in Houston before moving to East Texas at the end of 1984, there were no BBSes in the small towns I lived at during my East Texas high school years. Thus, no modem. Just a CoCo, a TV set, and floppy disk drive. I am not sure what else I had for my CoCo back then other than joysticks and some software.
The wooden desk was a kit I put together in late 1984. That desk made the move to Iowa with me in 1995 and went into storage temporarily while I was looking for a place to live. I remember hauling it from storage to my new apartment, and trying to drag it down the sidewalk towards the building. It feel apart. So, while it made it with me to Iowa, it never made it to the new computer room.
I also see Mickey Mouse ears on my TV, and now I want to find those. I recall buying some as a 20-something “adult” visiting the parks during work trips to California, but did not recall having some when I was in high school. Neat.
More fascinating posts like this to come… You have been warned.